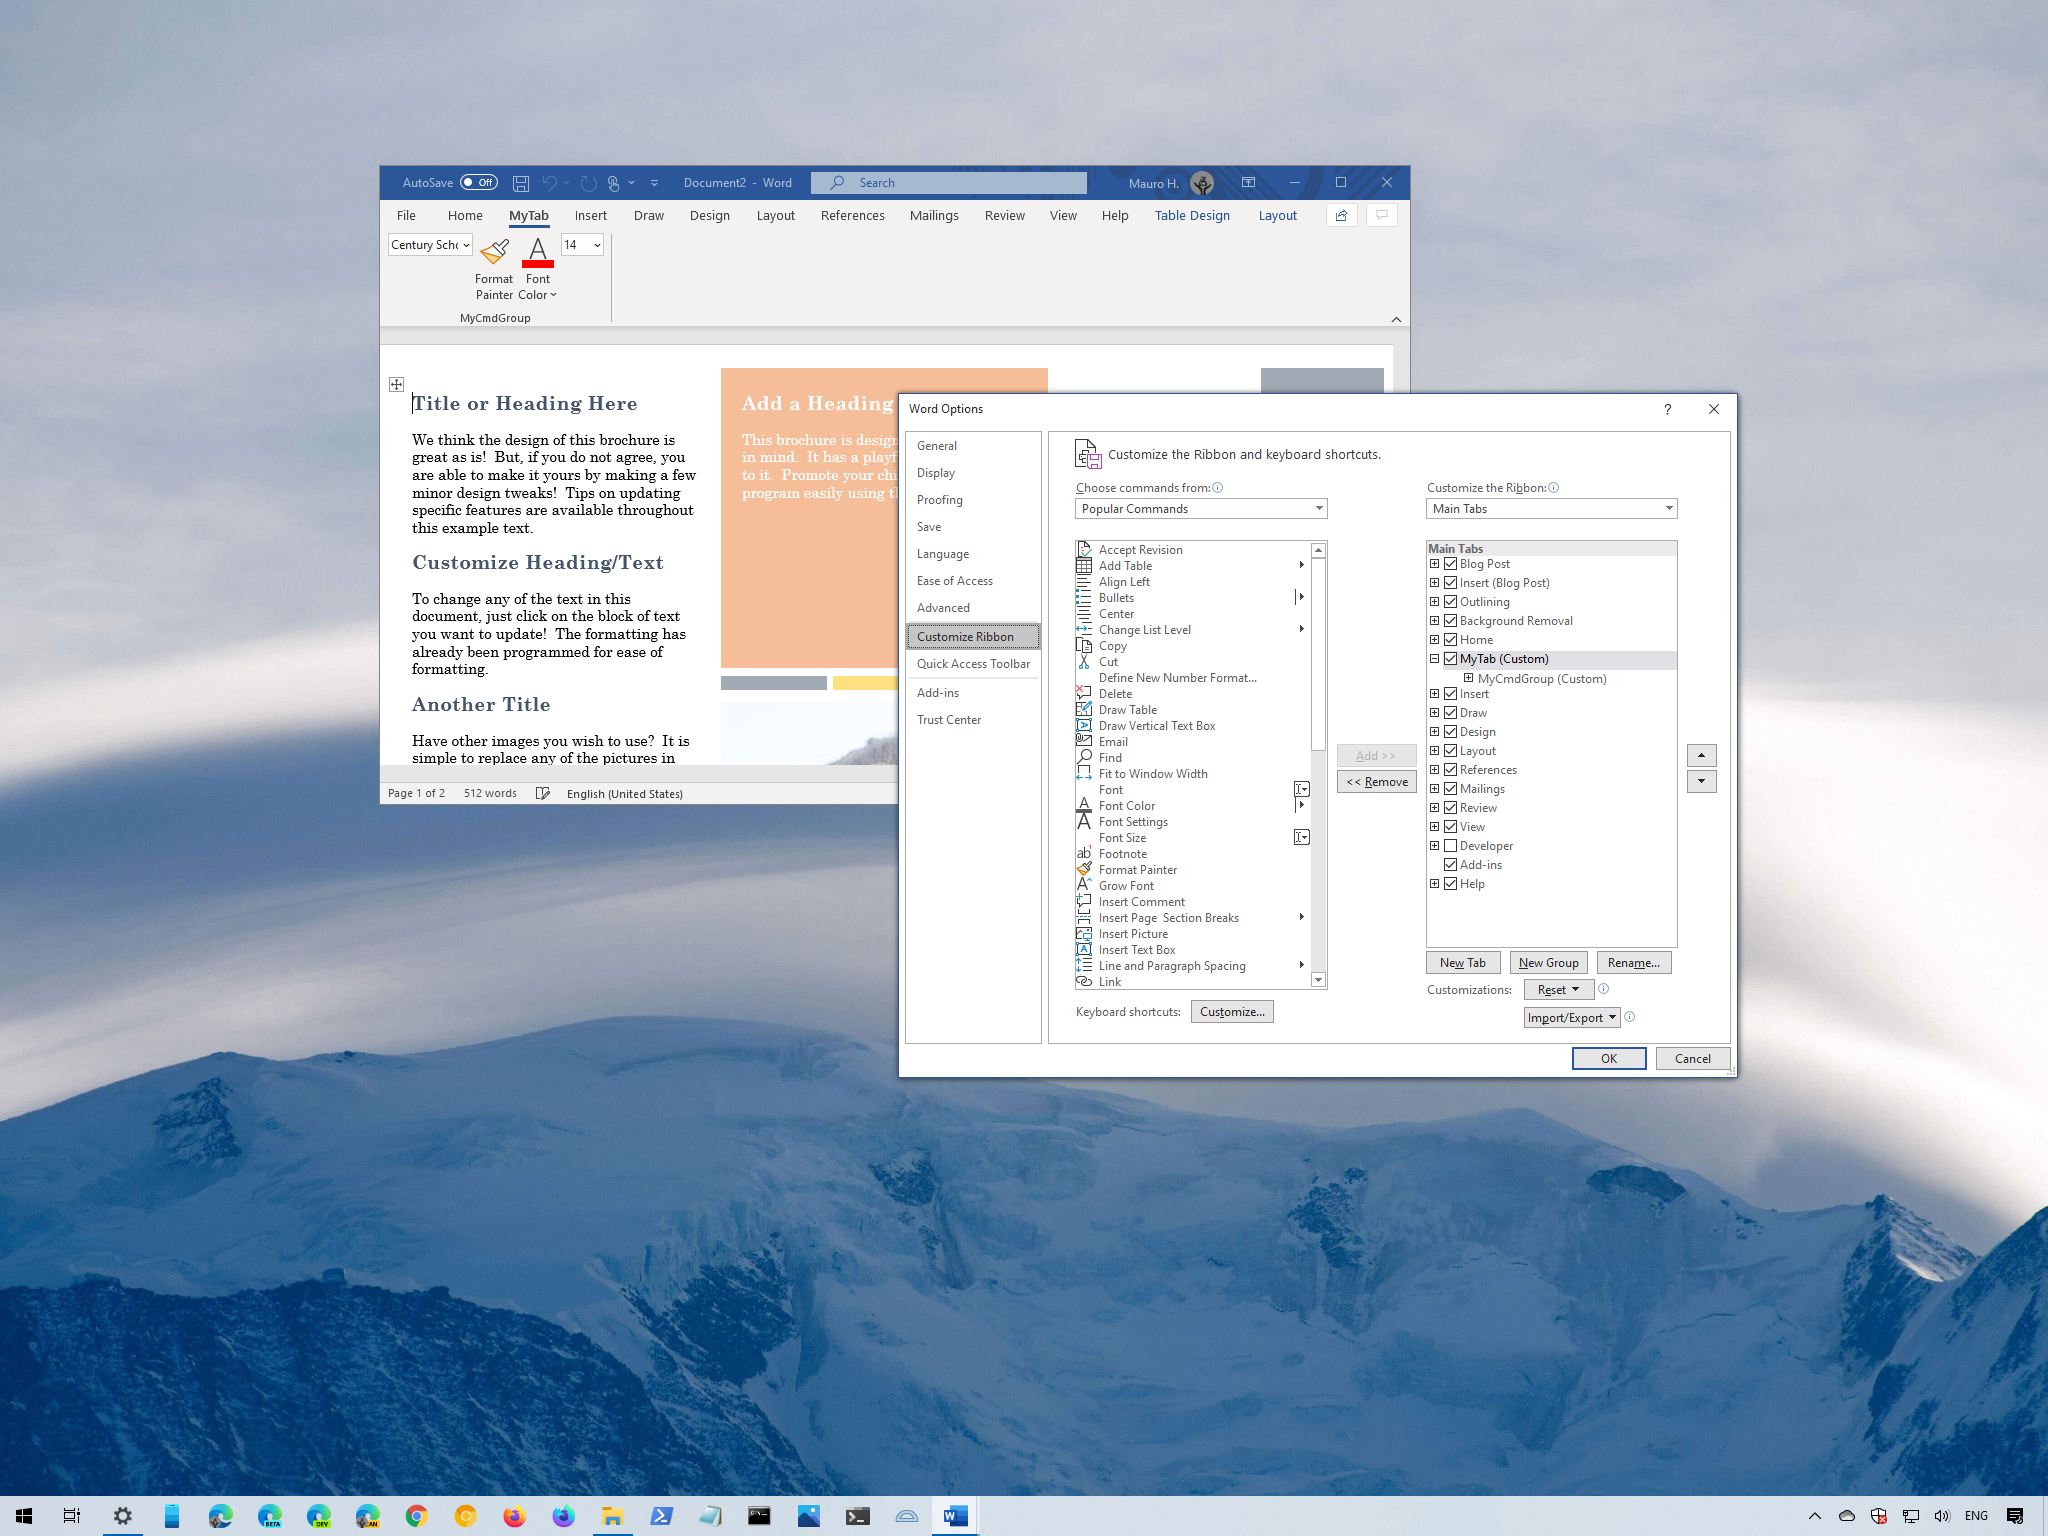
Yes, you can personalize the tabs, groups, and commands that appear in the ribbon menu of Office, and in this guide, we'll show you how to complete this task.
On Microsoft Office, Word, Excel, PowerPoint, and the other apps have a ribbon menu with many tabs (Home, Insert, etc.) that surface the commands you can use to work in a particular document or spreadsheet.
Although the default ribbon layout includes the most frequent commands that most users will need, logically organized in groups (Clipboard, Font, Paragraph, etc.), the apps allow you to customize the experience to improve your workflow on Windows 10 or macOS.
Whether you use the suite of Office apps with a Microsoft 365 subscription, Office 2019, or and older version, you can reorganize the existing tabs and groups. You can even create custom tabs with only the commands you need.
In this Windows 10 guide, we will walk you through the steps to customize the ribbon menu available in the Office apps.
- How to control ribbon menu in Office
- How to customize ribbon tabs in Office
- How to customize tab groups in Office
- How to customize group commands in Office
How to control ribbon menu in Office
Microsoft Office lets you show the ribbon menu for quicker access to settings, or you can hide it to make a little more room to work in a document or remove the clutter to keep you in focus. Also, there's even an option to reset the ribbon settings to their defaults.
Show or hide ribbon menu
To hide the ribbon to create more space in the app, use these steps:
- Open Office app.
-
Click the Collapse the Ribbon (^) button.
- (Optional) Use the Ctrl + F1 keyboard shortcut to hide the menu.
- (Optional) Double-click any tab to trigger the hide option.
- (Optional) Right-click the ribbon and select the Collapse the Ribbon option.
To show the ribbon in Office, use these steps:
- Open Office app.
- Click any tab to open the menu.
-
Click the Pin the Ribbon button.
- (Optional) Use the Ctrl + F1 keyboard shortcut to show the menu.
- (Optional) Double-click any tab to trigger the hide option.
- (Optional) Right-click the ribbon and select the Collapse the Ribbon option.
The steps to show or hide the ribbon only affects that specific application. You will need to follow the same steps on other applications.
Reset ribbon menu
To reset the Office ribbon menu to the default settings, use these steps:
- Open Office app.
-
Click on Options from the bottom-left corner.
Quick note: If you have a blank document open, you need to click the File menu to access the Options button. Alternatively, you can also right-click anywhere in the ribbon and select the Customize the Ribbon option to access the settings.
- Click on Customize Ribbon.
-
Under the "Customize the Ribbon" section, click the Reset drop-down menu and select the Reset all customizations option.
- Click the Yes button.
- Click the OK button.
Once you complete the steps, the custom ribbon settings will be removed, and the default configuration will be restored.
If you are running an older version of Office, you're missing out. If you switch to a Microsoft 365 subscription, you can always upgrade to the newest version of the most popular suite of apps to access the latest features for free, and you get many other benefits, such as sharing the account with up to six people and every user gets 1TB of OneDrive storage.
Microsoft 365
Get subscribed
From $70 at Microsoft
Microsoft 365 offers access to all the Office apps and many other features, such as 1TB of OneDrive and Outlook.com premium. You can also install Word, Excel, PowerPoint, Outlook, and other desktop apps on up to six devices, and depending on the plan, you can share the subscription with up to six people.
How to customize ribbon tabs in Office
Although the default ribbon configuration is optimal for most people, Office includes settings that allow you to create and customize new and existing tabs for quicker access to options and tools.
Create new ribbon tab
To create a new tab with custom sections and options, use these steps:
- Open Office app.
-
Click on Options from the bottom-left corner.
- Click on Customize Ribbon.
-
Under the "Customize the Ribbon" section, click the New Tab button.
- Click the OK button.
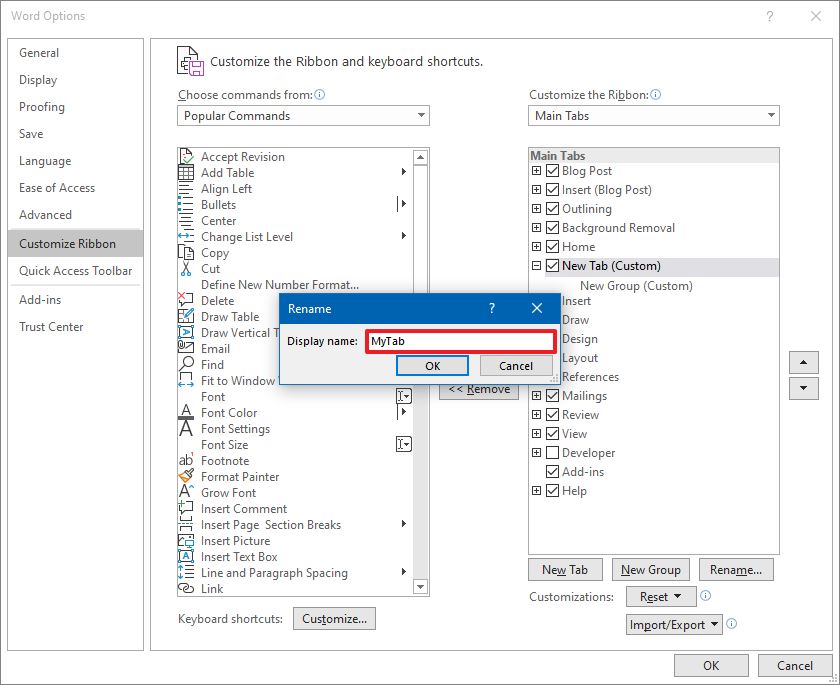
- Click the Rename button.
-
Confirm a name for the tab.
- Click the OK button.
- Click the OK button again.
After you complete the steps, the tab will appear in the ribbon menu of the Word, Excel, PowerPoint, or the app you were editing. However, the tab will not include any items until you create a group and commands you want to use.
Change ribbon tabs order
To change the order of the Office tabs, use these steps:
- Open Office app.
-
Click on Options from the bottom-left corner.
- Click on Customize Ribbon.
- Under the "Customize the Ribbon" section, select the tab on the right side.
-
Click the move up and mode down buttons on the right side to change its order.
- Click the OK button.
You can also select and drag the tab to the position you want.
Hide or show ribbon tab
To show or hide a ribbon tab in Office apps, use these steps:
- Open Office app.
-
Click on Options from the bottom-left corner.
- Click on Customize Ribbon.
-
Under the "Customize the Ribbon" section, clear the checkmark of the tab you want to hide.
- (Or) Check the tab to show it in the ribbon.
- Click the OK button again.
Once you complete the steps, the tab will now appear in the order you specified.
Rename ribbon tab
To change the name of a tab, use these steps:
- Open Office app.
-
Click on Options from the bottom-left corner.
- Click on Customize Ribbon.
- Under the "Customize the Ribbon" section, select the tab you want to rename.
-
Click the Rename button.
-
Confirm the new name.
- Click the OK button.
- Click the OK button again.
Alternatively, you can also right-click the tab and select the Rename option to specify a different name.
Delete ribbon tab
In Office, you can only delete custom tabs. If you do not want one of the default tabs, you can hide it instead.
To delete an Office tab, use these steps:
- Open Office app.
-
Click on Options from the bottom-left corner.
- Click on Customize Ribbon.
-
Under the "Customize the Ribbon" section, right-click the tab and select the Remove option.
- Click the OK button.
After you complete the steps, the tab will no longer be available in the Office ribbon.
How to customize tab groups in Office
In Office, groups are the sections within each tab that includes the commands you can use in the application, such as Cut, Paste, etc. If you are building a new or customizing an existing tab, you can determine which commands are available in each tab.
Create new command group
To create a new ribbon group, use these steps:
- Open Office app.
-
Click on Options from the bottom-left corner.
- Click on Customize Ribbon.
- Under the "Customize the Ribbon" section, on the right side, select the tab you want to add the group.
-
Click the New Group button.
- Click the Rename button.
- Select the icon for the group.
-
Confirm a display name for the group.
- Click the OK button.
- Click the OK button again.
Once you complete the steps, you can start adding any Office commands you want. You can also change the order, rename, or remove custom groups (see steps below).
Change command group order
To rearrange groups of Office commands, use these steps:
- Open Office app.
-
Click on Options from the bottom-left corner.
- Click on Customize Ribbon.
- Under the "Customize the Ribbon" section, expand the tab on the right side.
- Select the group.
-
Click the move up and mode down buttons on the right side to change its order.
Quick note: You can change the order within the tab or move the group to another tab.
- Click the OK button.
After you complete the steps, the group will relocate to the position you specified.
Rename command group
To rename a ribbon group in Office, use these steps:
- Open Office app.
-
Click on Options from the bottom-left corner.
- Click on Customize Ribbon.
- Under the "Customize the Ribbon" section, expand the tab on the right side.
- Select the group.
-
Click the Rename button.
- (Optional) Select the new icon for the group.
-
Confirm the new display name.
- Click the OK button.
Once you complete the steps, the new name for the group will be reflected in the group.
Remove command group
To remove a group of commands, use these steps:
- Open Office app.
-
Click on Options from the bottom-left corner.
- Click on Customize Ribbon.
- Under the "Customize the Ribbon" section, expand the tab on the right side.
-
Right-click the group and select the Remove option.
- Click the OK button.
After you complete the steps, the group will be removed from the tab.
How to customize group commands in Office
Once you create a new tab and group, you can add and remove any command you want. You can even customize the commands that appear in the default tabs.
Add or remove Office commands
To add or remove Office commands to the ribbon menu, use these steps:
- Open Office app.
-
Click on Options from the bottom-left corner.
- Click on Customize Ribbon.
- Under the "Customize the Ribbon" section, expand the tab on the right side.
- Expand the group.
-
Under the "Choose commands from" section, select the command you want to include in the tab and group.
Quick tip: If the command you want is not available in the default list, use the drop-down Choose commands from menu and select the category or choose the All Commands option to get a list of all the available Office commands.
-
Click the Add button.
- (Optional) Under the "Customize the Ribbon" section, select the item from the group.
-
Click the Remove button.
- Click the OK button.
After you complete the steps, you may need to repeat steps No. 6 and 7 or steps No. 9 and 10 to add or remove more commands.
Change Office command order
To change the Office command order, use these steps:
- Open Office app.
-
Click on Options from the bottom-left corner.
- Click on Customize Ribbon.
- Under the "Customize the Ribbon" section, expand the tab on the right side.
- Expand the group.
- Select the command you want to reorganize.
-
Click the move up and mode down buttons on the right side to change its order.
- Click the OK button.
Once you complete the steps, the command will be position in the location you specified.
Rename Office command
To change the Office command name, use these steps:
- Open Office app.
-
Click on Options from the bottom-left corner.
- Click on Customize Ribbon.
- Under the "Customize the Ribbon" section, expand the tab on the right side.
- Expand the group.
- Select the command you want to change its name.
-
Click the Rename button.
-
Confirm the new name.
- Click the OK button.
- Click the OK button again.
After you complete the steps, the new name will be reflected in the command.
More Windows 10 resources
For more helpful articles, coverage, and answers to common questions about Windows 10, visit the following resources:


No comments: