Here's how to configure the Microsoft Edge Chromium in kiosk mode on Windows 10.
On Windows 10, "Assigned Access" allows you to configure a computer as a kiosk to provide a specific service to the end-user in a locked-down environment without access to other apps, settings, or the desktop. Typically, you will find devices with this configuration on touch-points for frontline workers, lobbies to allow guests to browse the internet, and digital signs.
Although you can set up kiosk mode with virtually any app available through the Microsoft Store, one common scenario is to use it with Microsoft Edge. However, since the support for the legacy version of the browser is coming to an end on March 9, 2021 and then replace with the version based on the Chromium engine with the Windows 10 update arriving on April 13, 2021, the steps to set up the experience will be slightly different, depending on when you are configuring the feature.
If you already have a device working as a kiosk, the setup will stop working unless you install the Chromium version of Microsoft Edge and reconfigure Assigned Access before the April update installs.
In this Windows 10 guide, we will walk you through the steps to configure kiosk mode with Microsoft Edge as support for the legacy version of the browser comes to an end.
- How to prepare to set up Microsoft Edge in kiosk mode on Windows 10
- How to set up Microsoft Edge in kiosk mode on Windows 10
How to prepare to set up Microsoft Edge in kiosk mode on Windows 10
The ability to select the new version of Microsoft Edge to set up kiosk mode is expected to be available with a patch arriving in March, which means that you will have to wait until the update installs automatically to configure the experience. However, if you are already dealing with a kiosk setup, it is recommended to plan and test the approach by either installing the latest preview build available through the Beta Channel (build 19042.844) or installing the preview of the next cumulative update releasing at the end of February (also known as the "C" update).
If you are reading this guide after the legacy is no longer supported and removed from Windows 10, you can skip the update steps, and you can continue with the kiosk setup as usual.
Update to build 19042.844 or higher
To install the latest preview of Windows 10 with support to configure kiosk mode with the Chromium version of Edge, use these steps:
- Open Settings.
- Click on Update & Security.
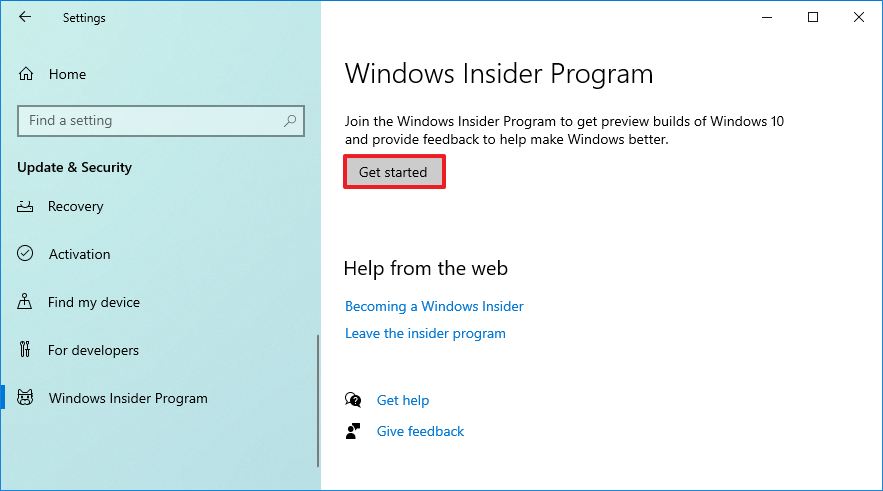
- Click on Windows Insider Program.
-
Click the Get started button.
-
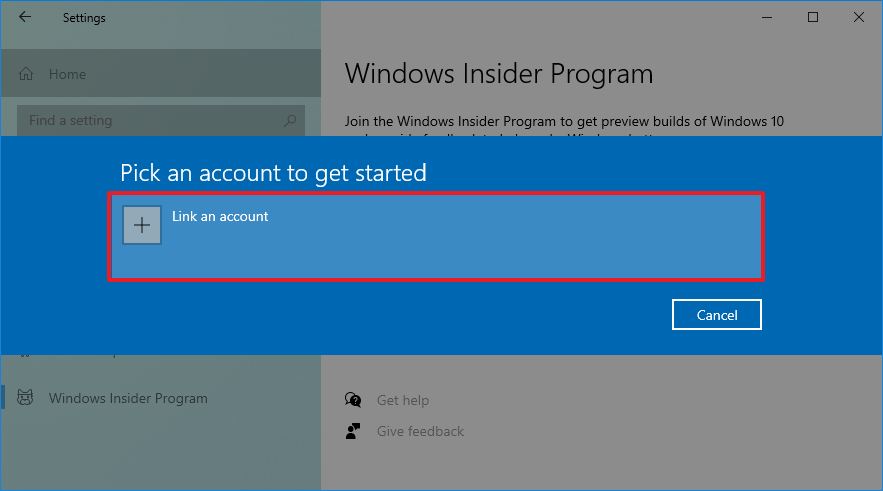
Click the Link an account button.
- Sign in with your Microsoft account.
- Click the Continue button.
-
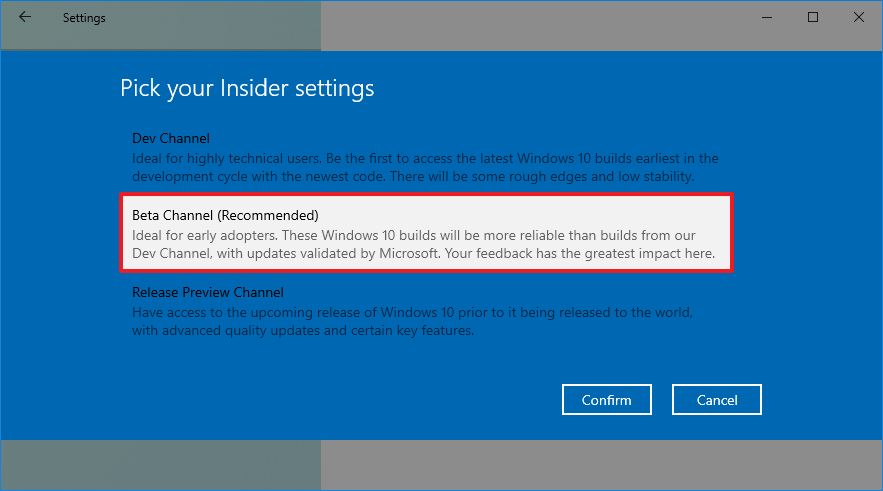
Under the "Pick your Insider settings" section, select the Beta Channel option.
- Click the Confirm button.
- Click the Confirm button to agree to the terms and conditions.
- Click the Restart button.
- Click on Update & Security.
- Click on Windows Update.
-
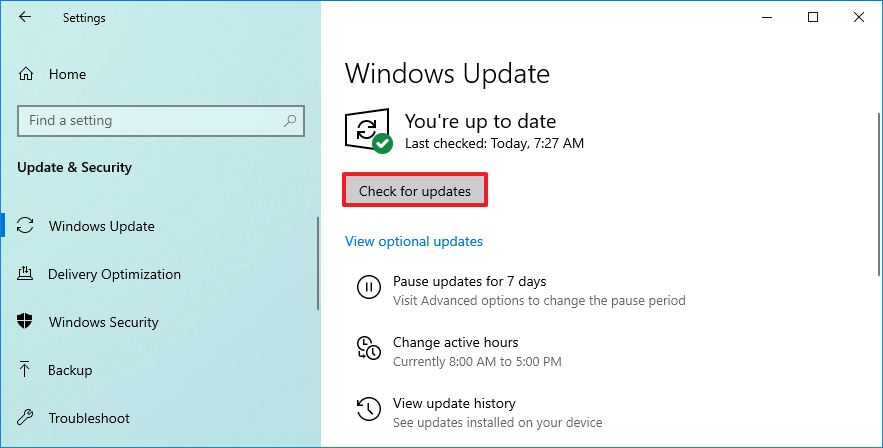
Click the Check for updates button.
Quick note: If you are already running Windows 10 version 20H2, the update will download and install quickly. If you have an older version, such as version 1909 or an older release, the update will require full reinstallation.
Once you complete the steps, you can use the instructions below to set up Edge in kiosk mode.
Optional update installation
If the February preview update for Windows 10 is available, you should be able to download it manually by determining the knowledge base (KB) in the Windows 10 Update History page and doing a search in the Microsoft Update Catalog website. You can use these steps to download and install updates manually.
Alternatively, you may also be able to install the update from the Windows Update settings using the optional updates feature:
- Open Settings.
- Click on Update & Security.
- Click on Windows Update.
-
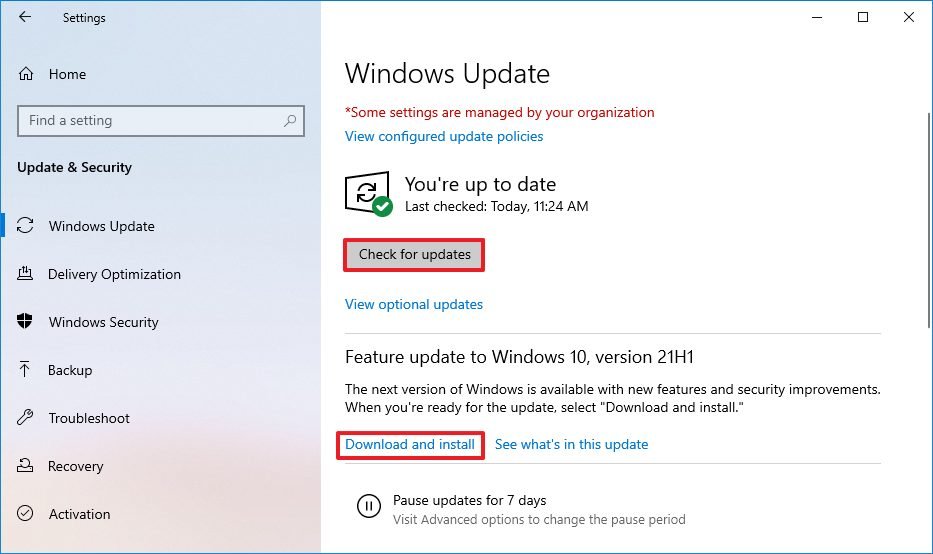
Click the Check for updates button.
- Under the "Optional quality update available" section, click the Download and install option (if applicable).
After you complete these steps, the device will update to the newest build that allows selecting the Chromium version of Microsoft Edge during the kiosk setup.
Install Microsoft Edge on Windows 10
If the device does not already have the new version of the browser, use these steps:
- Open Microsoft Edge download page.
- Click the Download button to save the installer on your device.
- Double-click the file to begin the installation.
Once you complete the steps, the browser will install automatically on the device.
Since some of the features available in the legacy version won't be available for kiosk mode immediately, you should consider testing kiosk mode with the version of Edge available through the Beta Channel.
How to set up Microsoft Edge in kiosk mode on Windows 10
To set up Microsoft Edge in kiosk mode on Windows 10, use these steps:
- Open Settings.
- Click on Accounts.
- Click on Family & other users.
-
Under the "Set up a kiosk" section, click the Assigned access option.
-
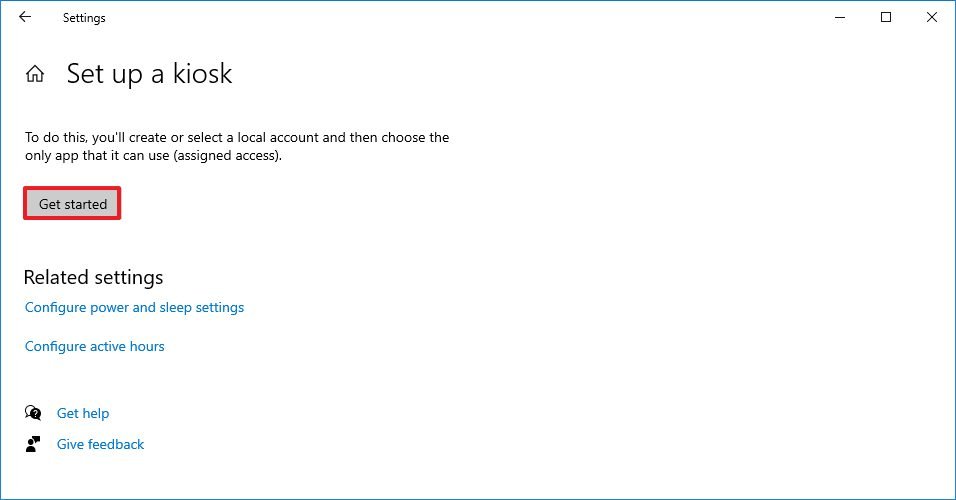
Click the Get started button.
-
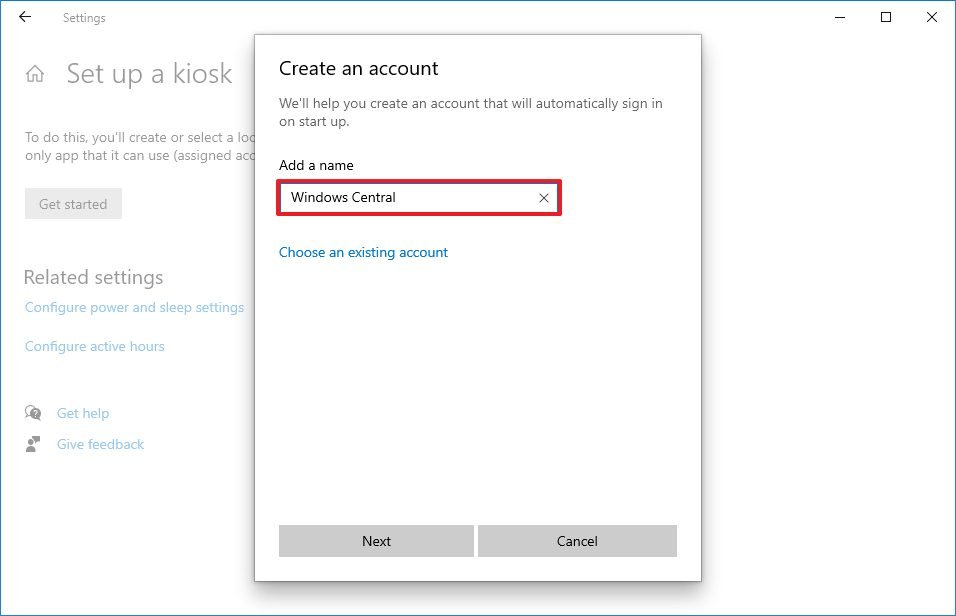
Confirm a name for the account that will sign in automatically to launch the kiosk experience.
- Click the Next button.
-
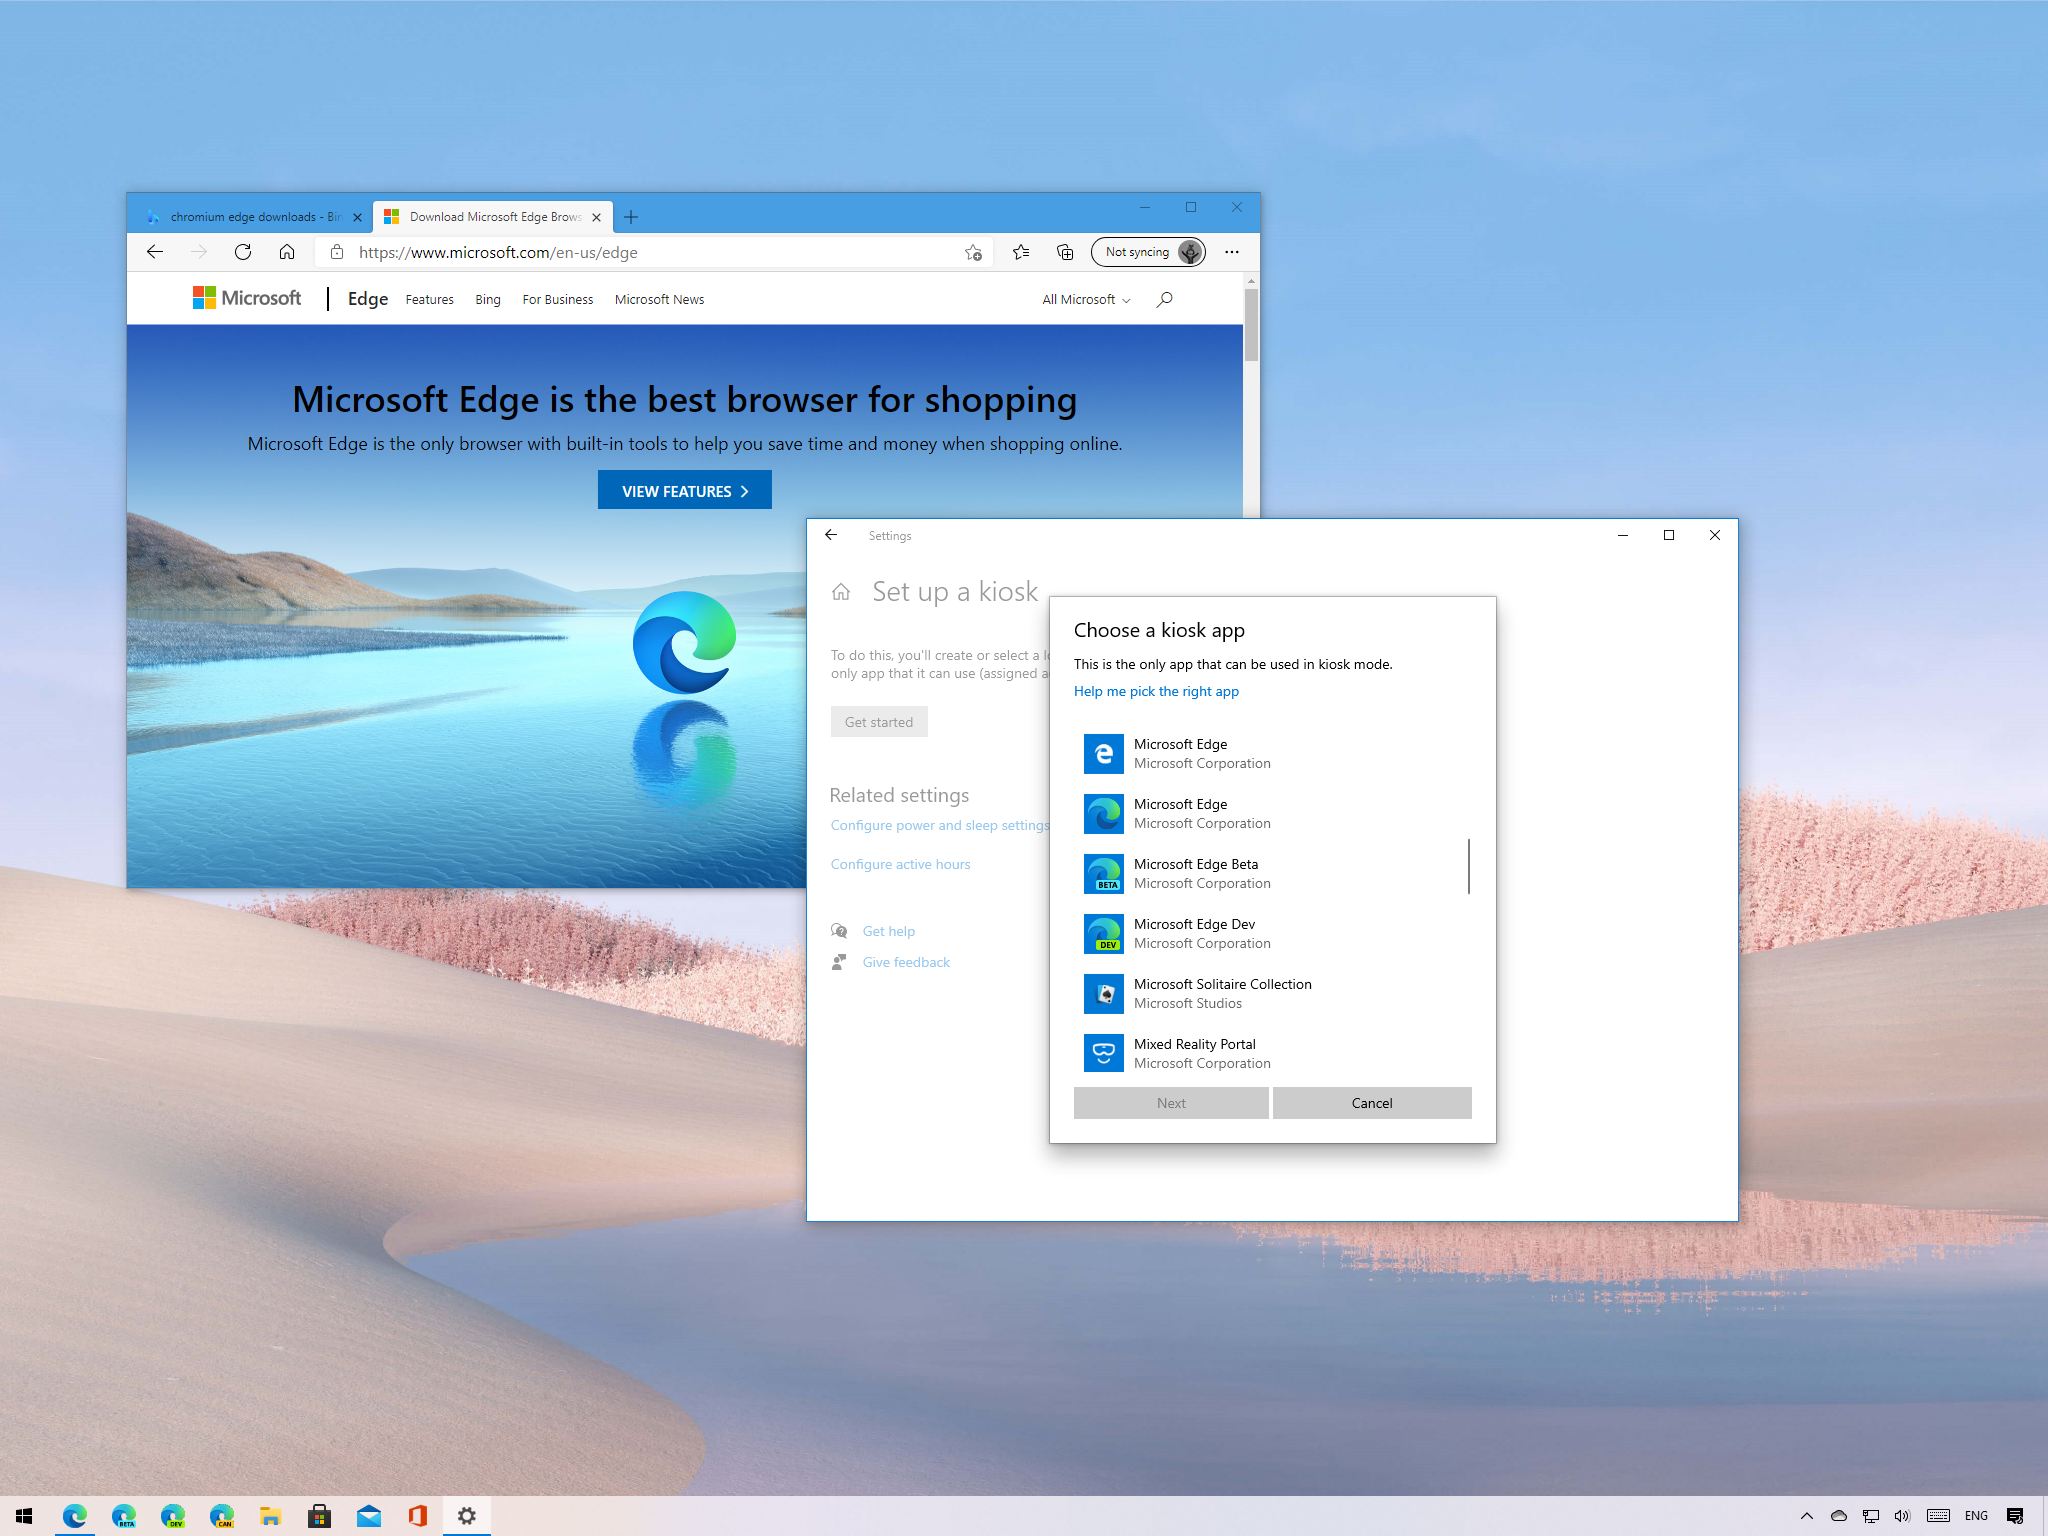
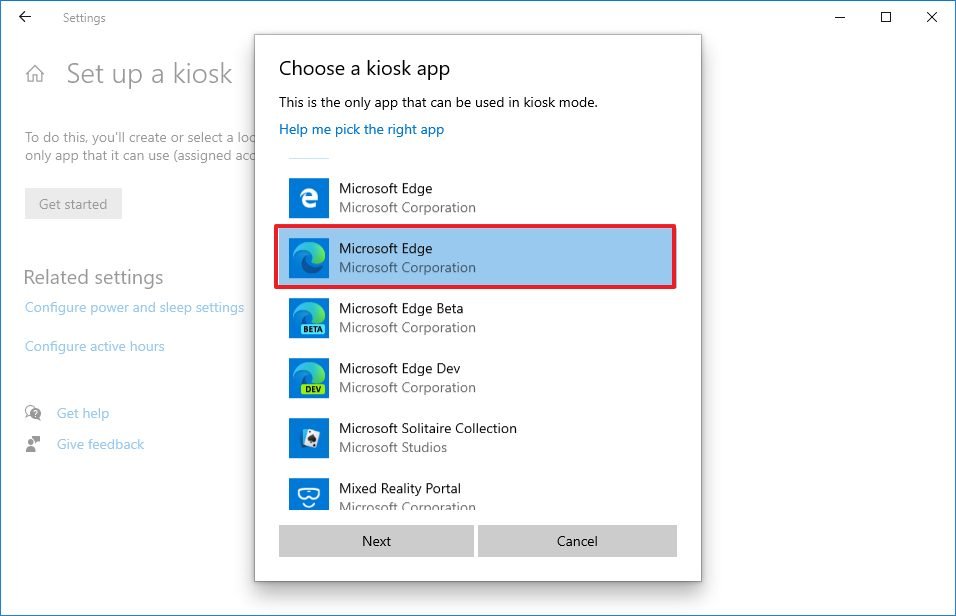
Select the Chromium version of Microsoft Edge app.
Quick tip: If you are setting up a test environment, you can also select the Beta or Dev version of Edge to test the setup with upcoming features (if applicable).
-
Click the Next button.
-
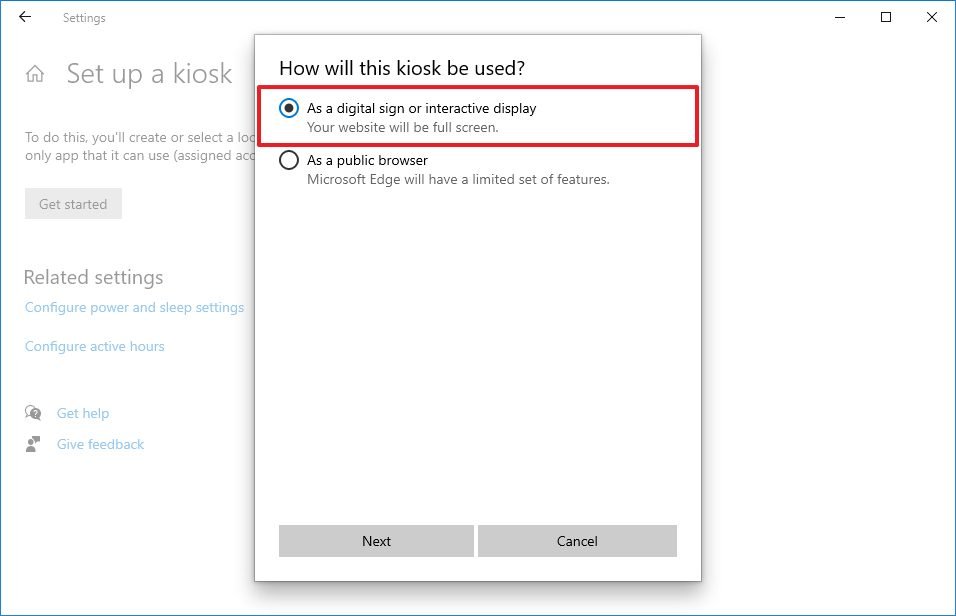
Select the display option:
- As a digital sign or interactive display – launches a website in full screen.
- As a public browser – opens Microsoft Edge with support for limited tabs.
- Click the Next button.
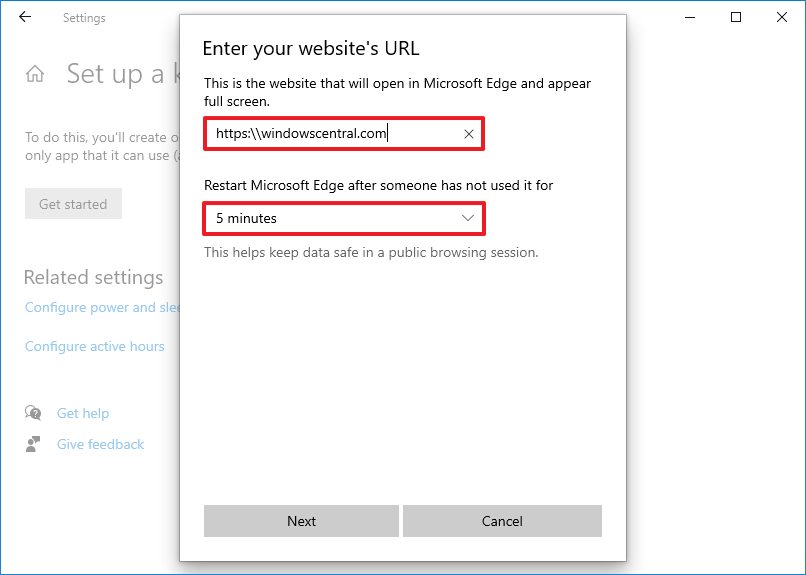
- Confirm the website URL – for example,
https:\\windowscentral.com. -
Select the time reset option when the browser is not actively being used. (Options include, never, five minutes to 24 hours.)
- Click the Next button.
- Click the Close button.
- Restart the computer.
Once you complete the steps, the device will restart and automatically sign in to the kiosk mode with Microsoft Edge.
Update kiosk mode settings
If you need to change the settings, use these steps:
- Use the Windows key + Ctrl + Del keyboard shortcut to open the sign-in screen.
- Sign out of the kiosk account.
- Sign in to a regular administrator account.
- Open Settings.
- Click on Accounts.
- Click on Family & other users.
-
Under the "Set up a kiosk" section, click the Assigned access option.
-
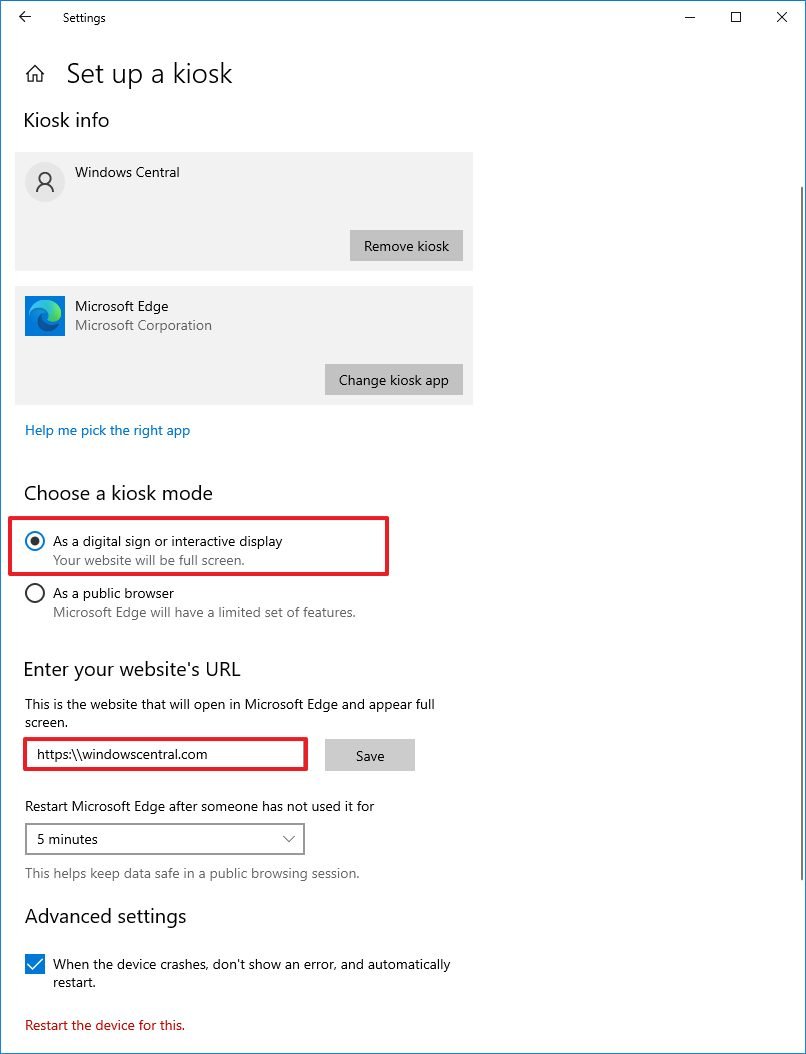
(Optional) Choose a different kiosk mode.
- (Optional) Change the website or restart time.
Once you complete the steps, the kiosk mode will be updated with the new settings.
Remove kiosk mode on Windows 10
Although you still have the legacy version of the browser, you can update the kiosk settings. It is recommended to remove the current setup and reconfigure the feature to make sure everything works as expected.
To remove the current kiosk mode setup, use these steps:
- Open Settings.
- Click on Accounts.
- Click on Family & other users.
-
Under the "Set up a kiosk" section, click the Assigned access option.
-
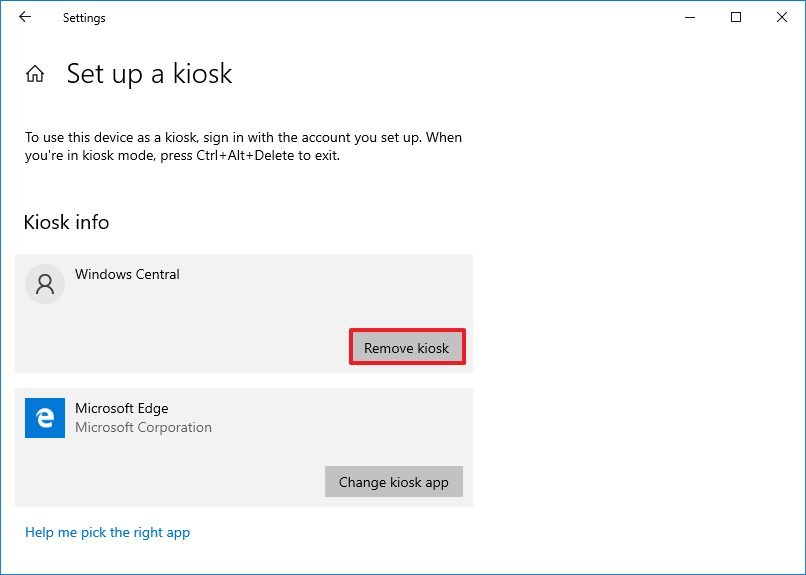
Under the "Kiosk info" section, select the account and click the Remove kiosk button.
-
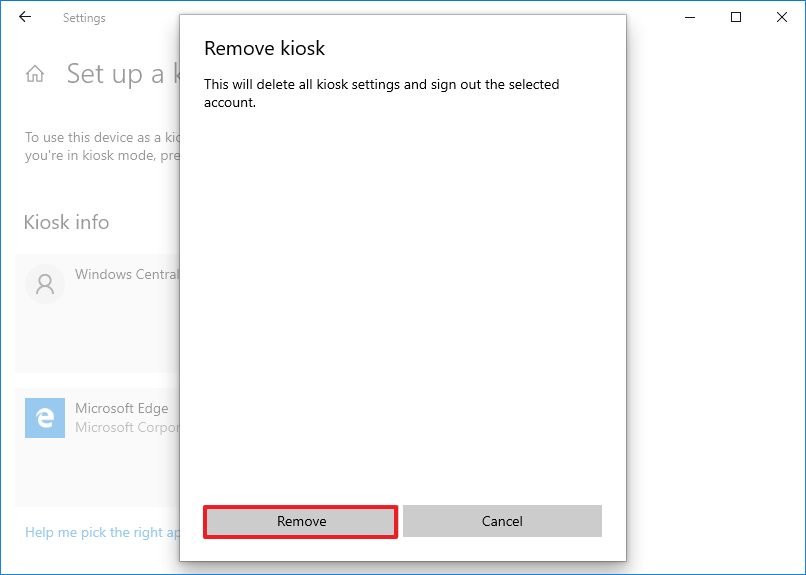
Click the Remove button to confirm.
After you complete the steps, use the above steps to set up a new kiosk mode using the Chromium version of Microsoft Edge.
More Windows 10 resources
For more helpful articles, coverage, and answers to common questions about Windows 10, visit the following resources:

No comments: