Securing your data on even the best Synology NAS is incredibly important. Much like any online account, it's best to use two-factor authentication, or better yet multi-factor authentication. DSM 7.0 introduced support for the latter with a shiny new SignIn app that helps protect your NAS and sensitive data.
This guide is tailored to Synology DSM 7.0, but two-factor authentication initialization on earlier OS versions is similar.
How to set up SignIn (2FA)
- Click on the user icon in the top-right.
- Select Personal.
-
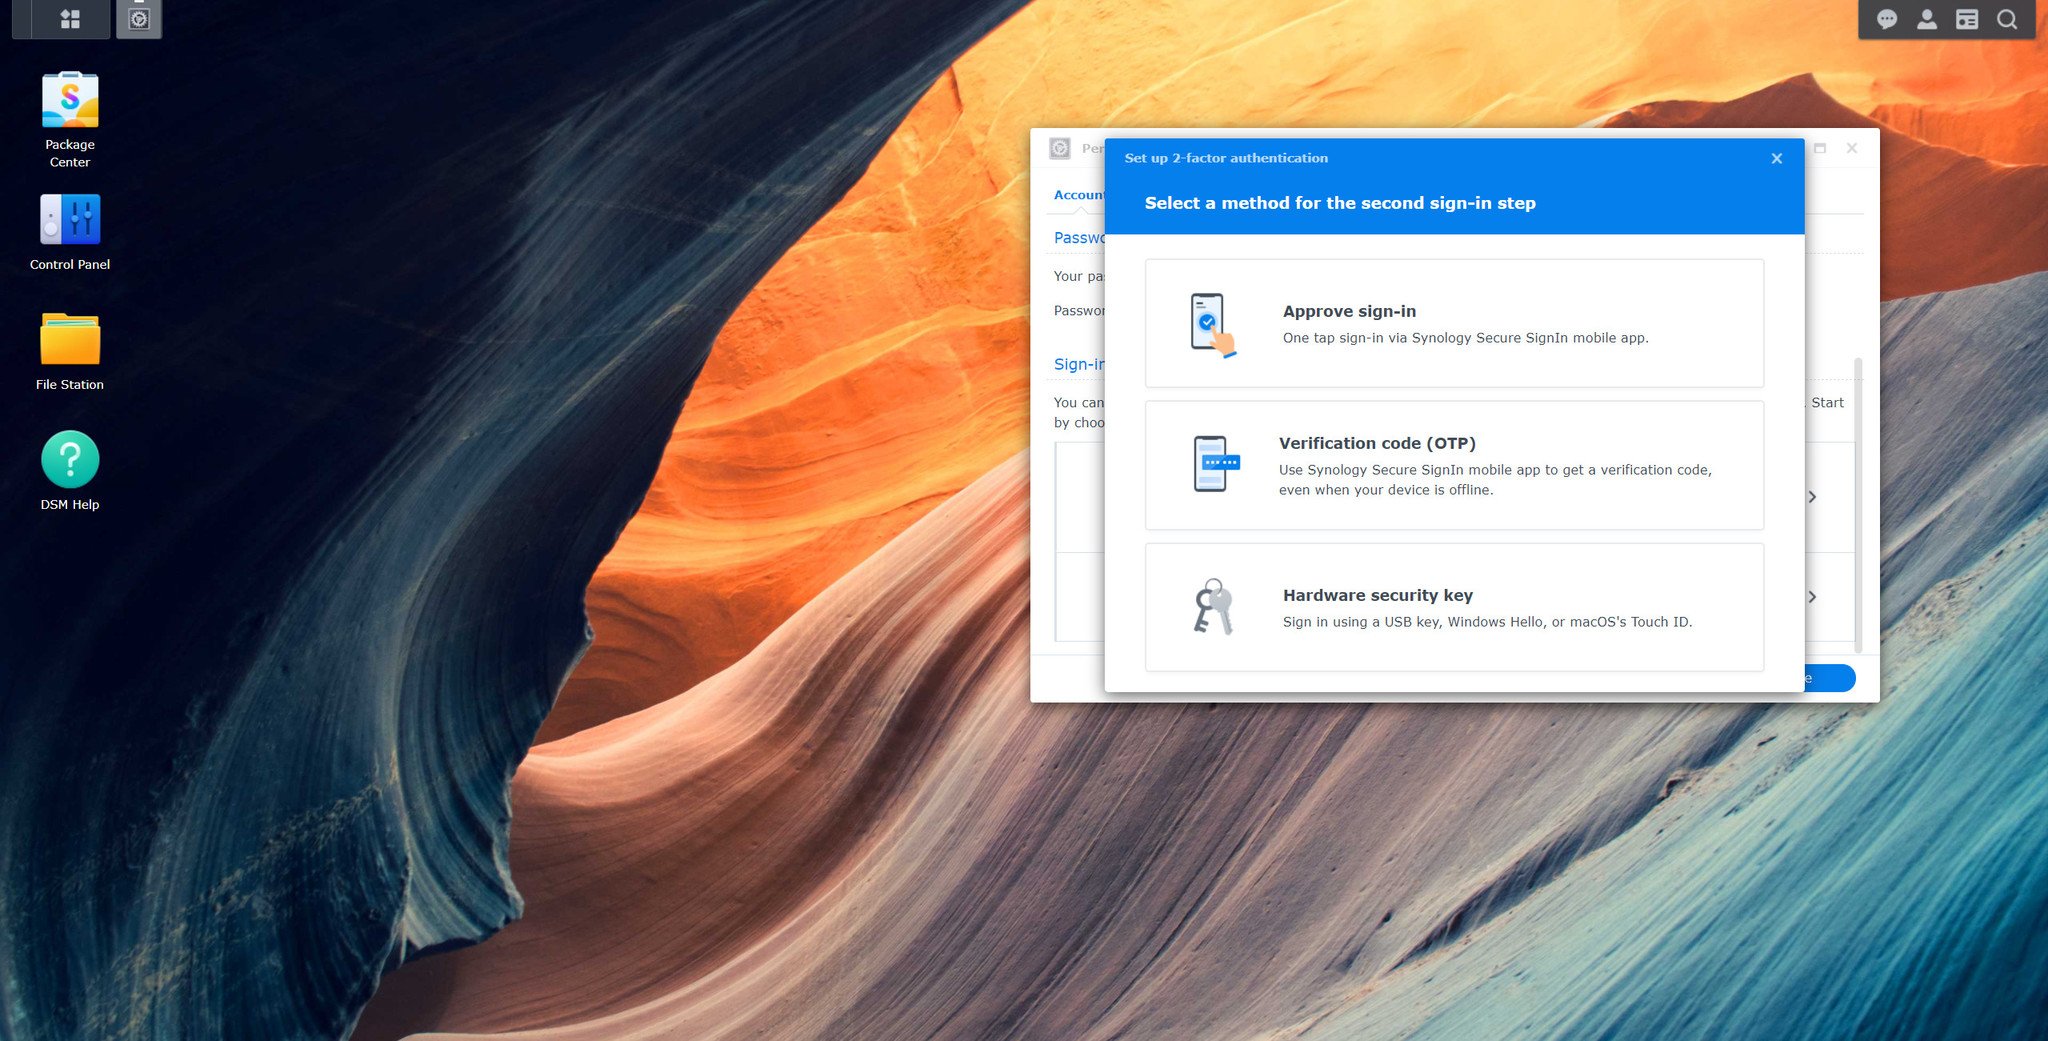
Select two-factor authentication.
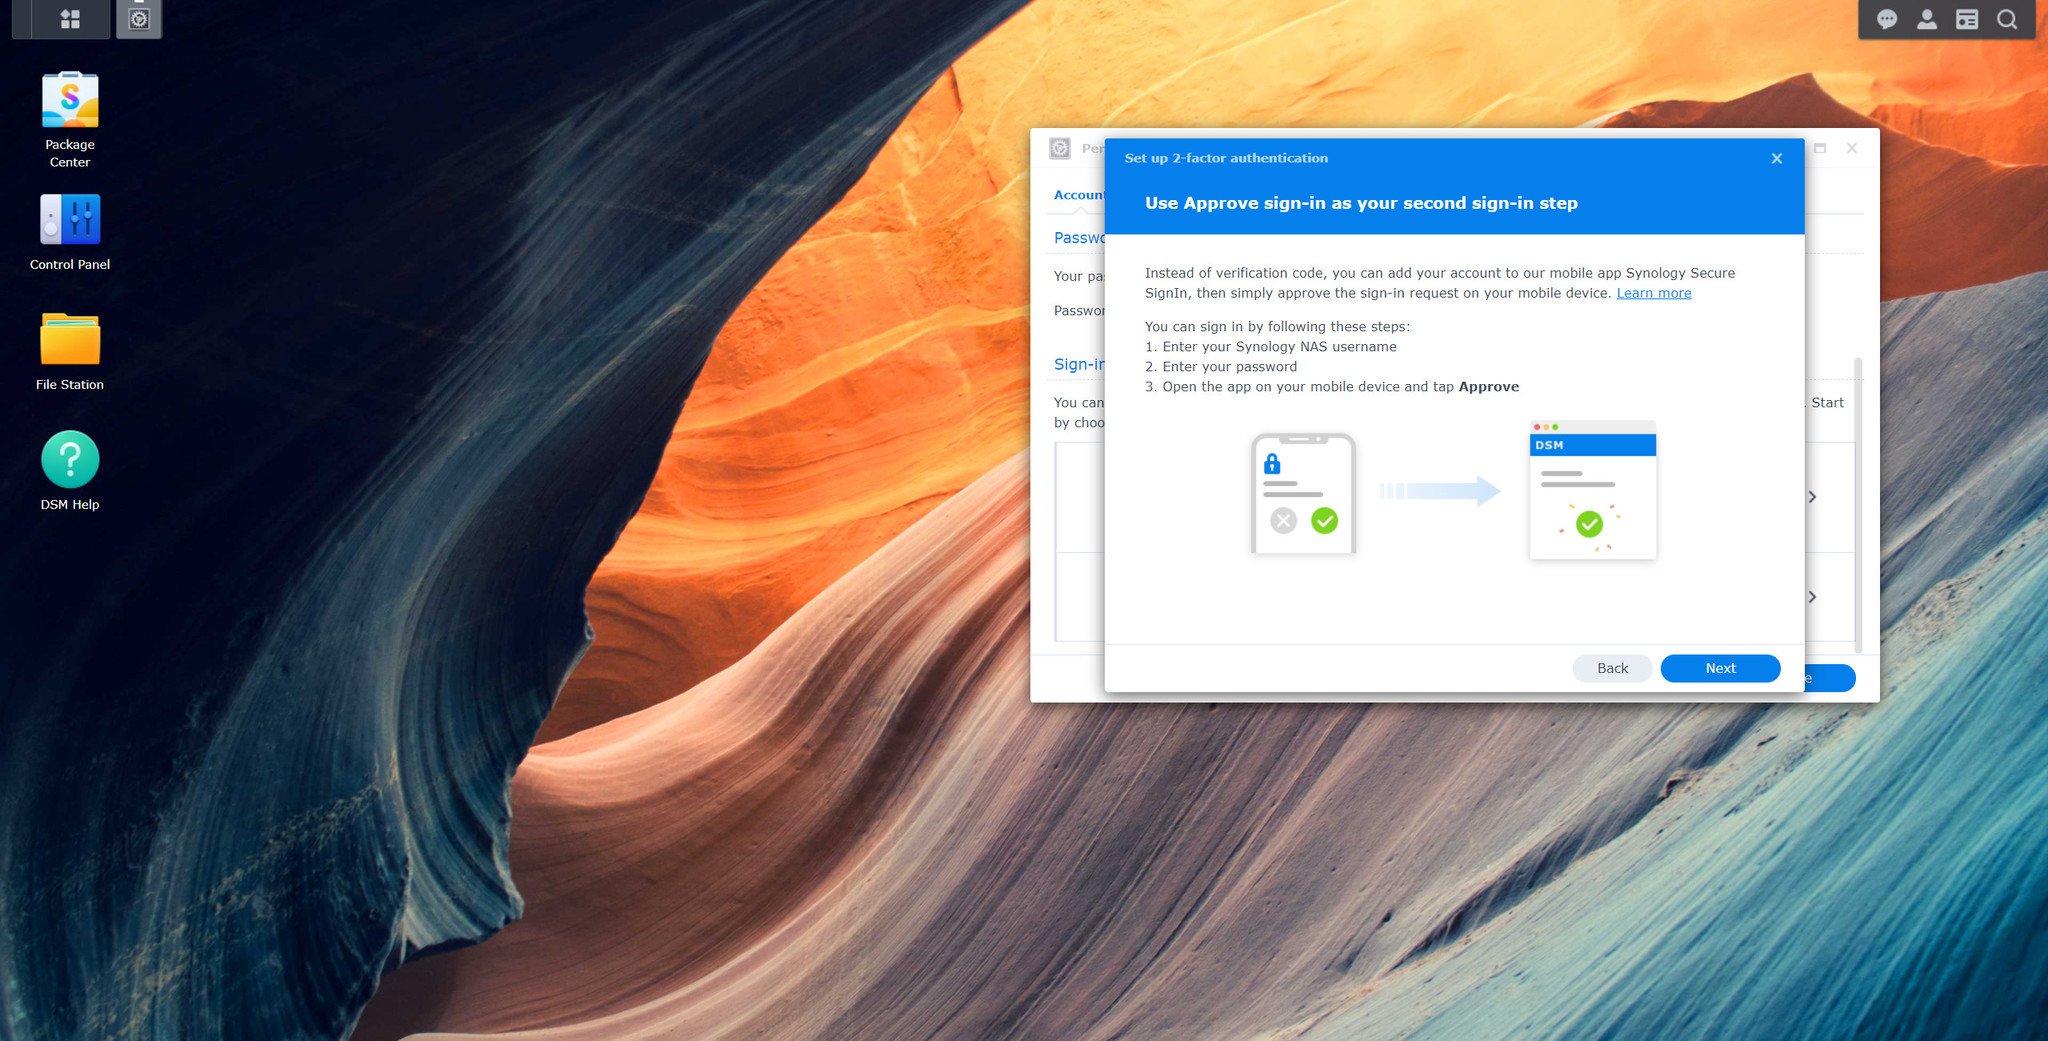
- Select Approve sign-in.
- Activate QuickConnect (if not done already).
- Verify your account password.
-
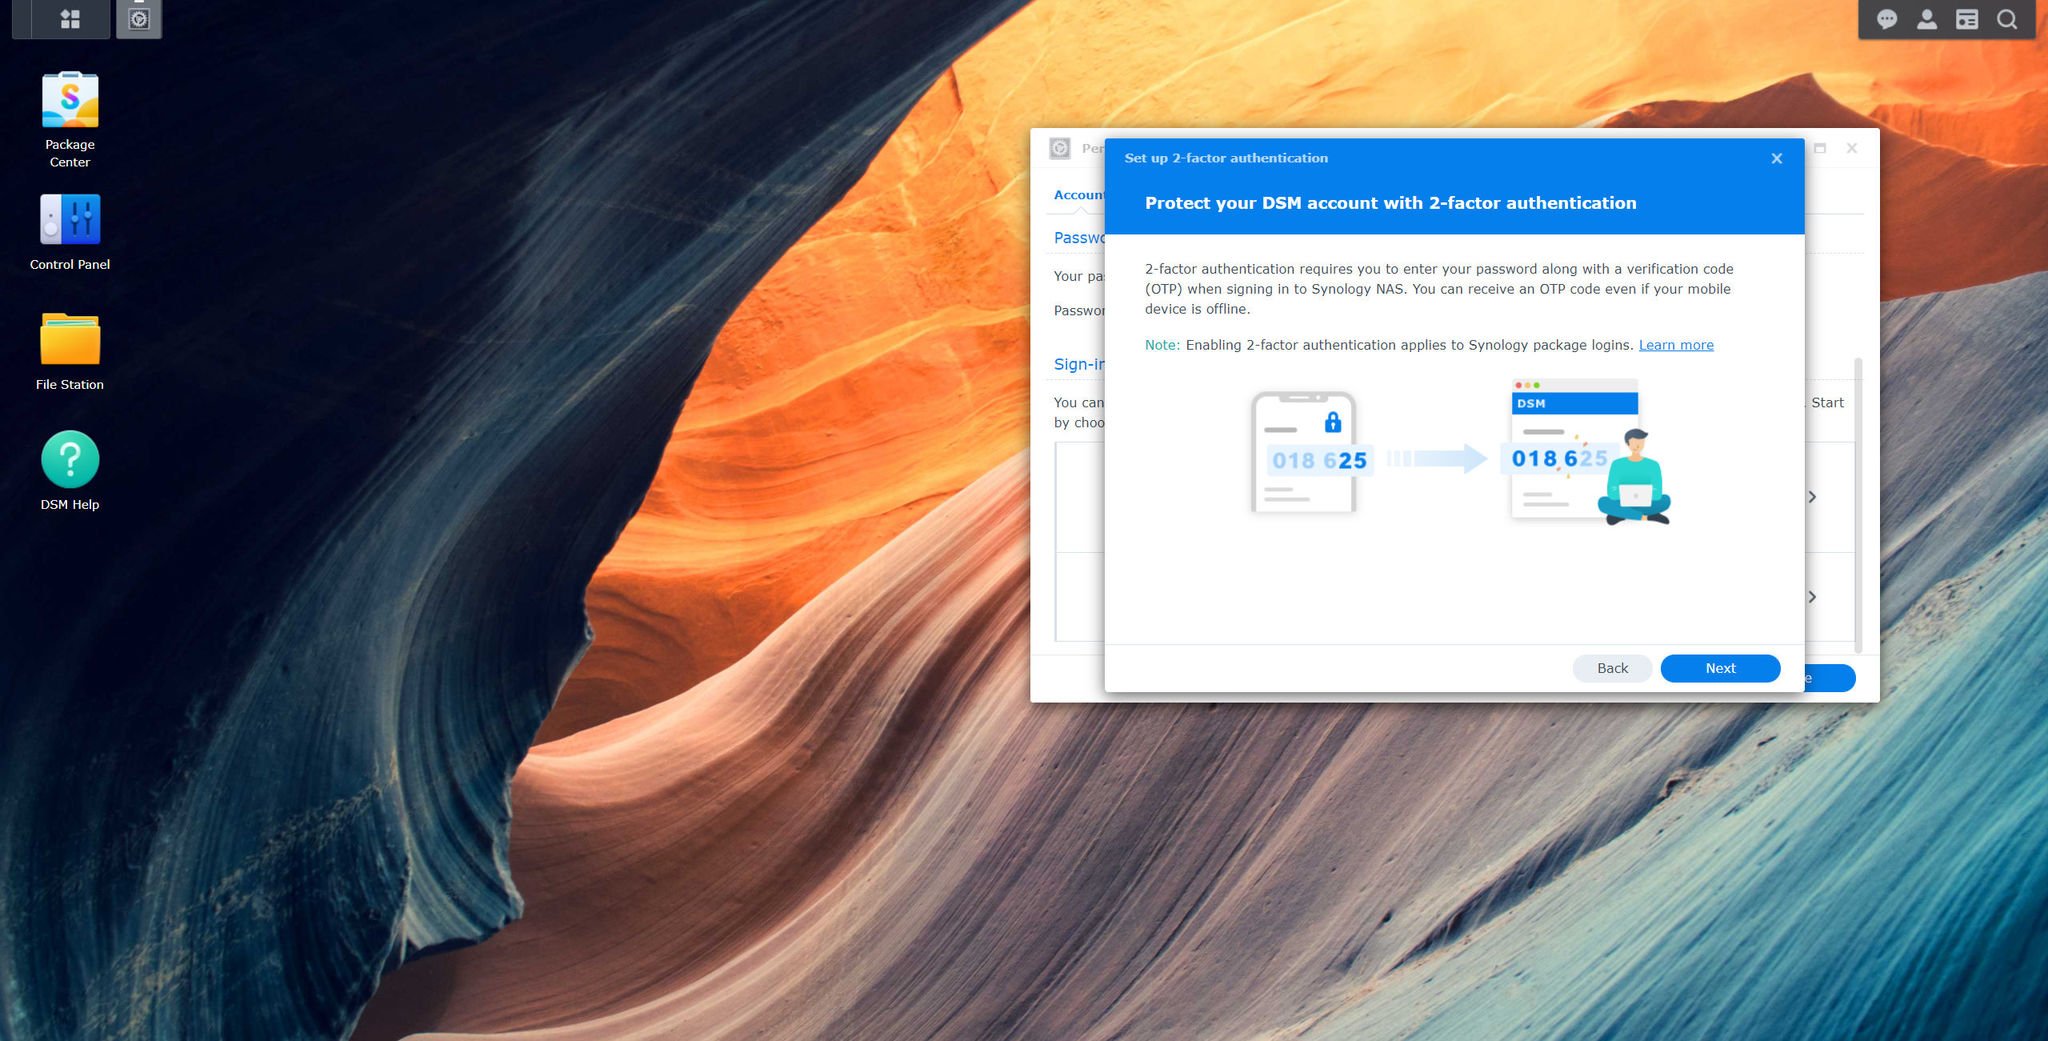
Read through the information and click Next.
- Download Synology SignIn app using the QR codes displayed, App Store, or Google Play.
- Click Next.
- Scan the QR code with the SignIn app.
- Click Next.
- Select OTP in the SignIn smartphone app.
- Select the + icon up top to open the camera.
- Scan the QR code to create an OTP link.
- Enter the OTP in the browser.
- Click Next.
- Enter a backup email address.
- Click Next.
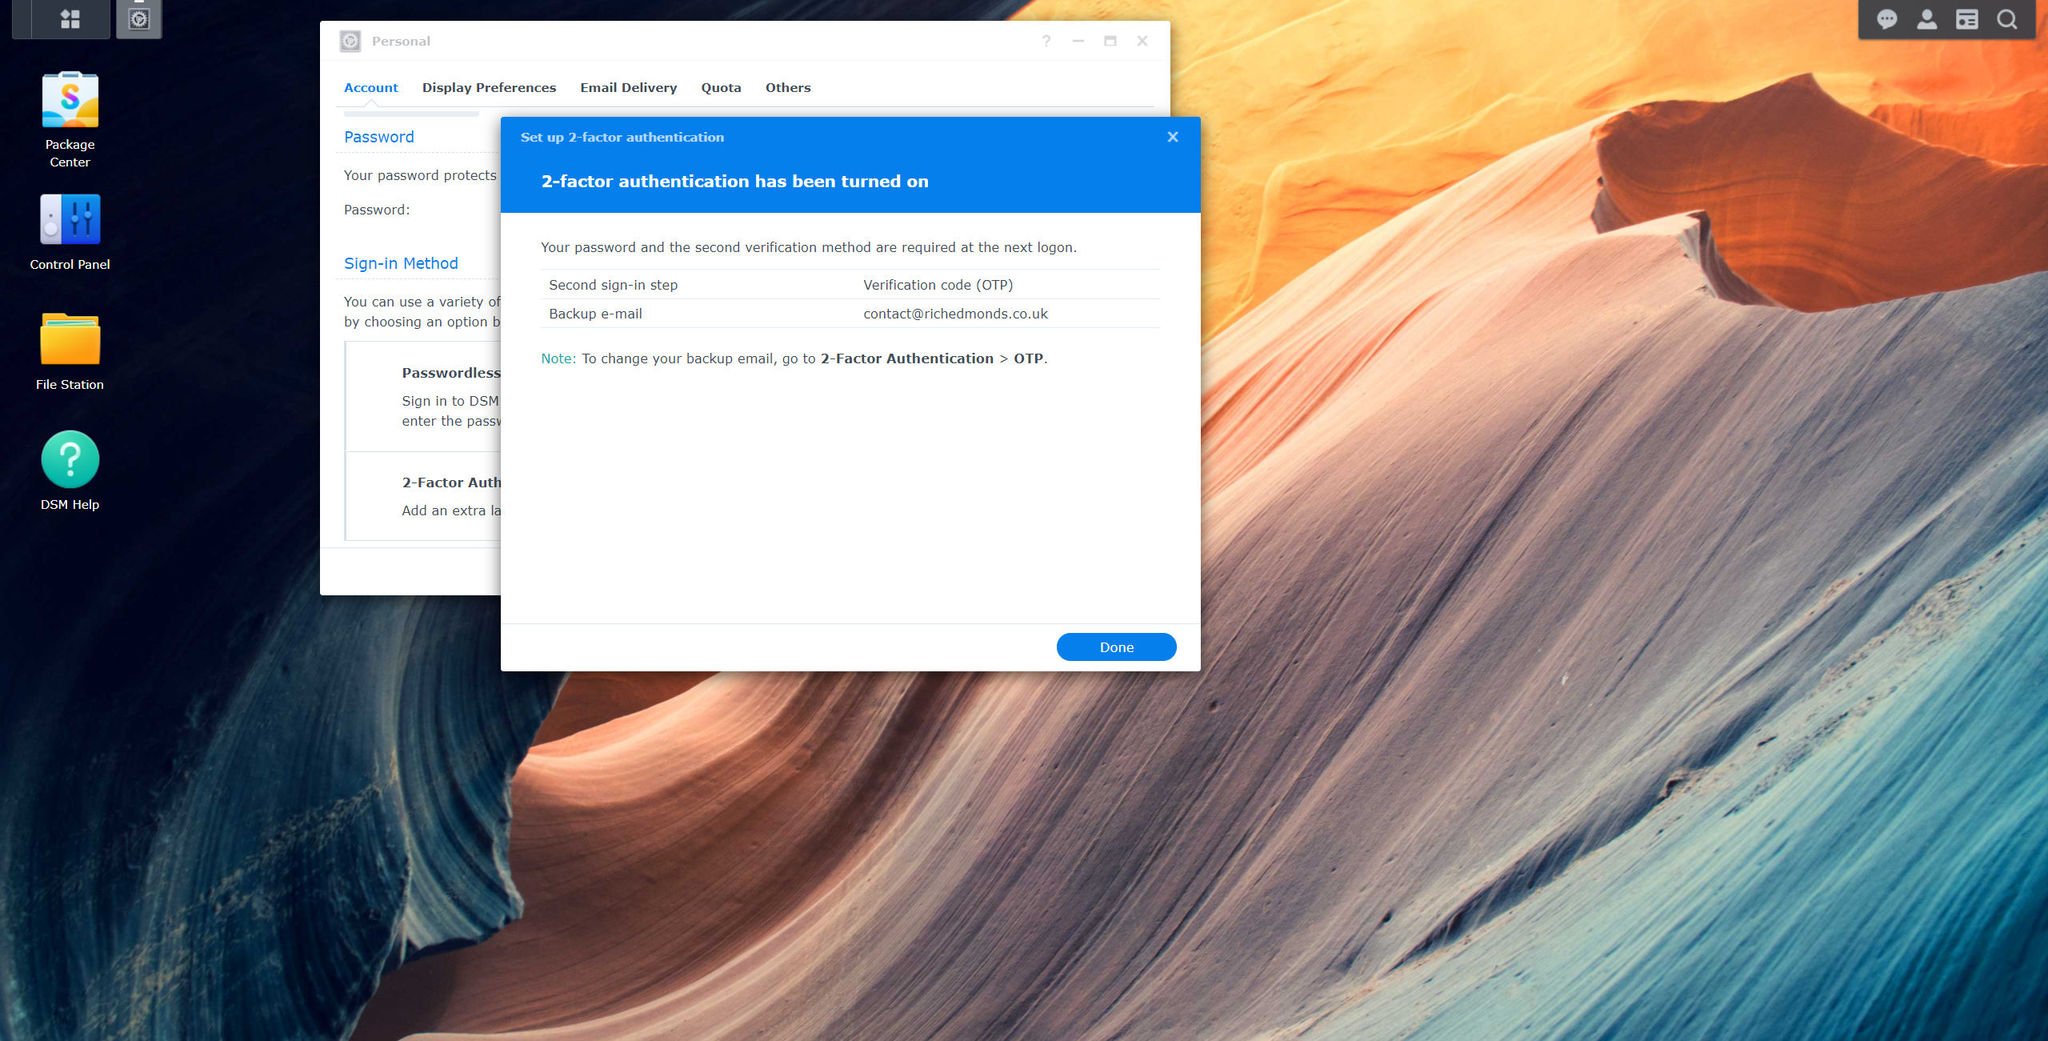
- Click Done.
The Synology SignIn app is now configured for your NAS with a one-time password and secure sign-in methods that will be required upon logging in, as well as the account password.
How to set up one-time passcodes (2FA)
- Click on the user icon in the top-right.
- Select Personal.
- Select two-factor authentication.
- Select Verification Code (OTP).
- Verify your account password.
-
Read through the information and click Next.
- Download Synology SignIn app using the QR codes displayed, App Store, or Google Play.
- Click Next.
- Scan the QR code with the SignIn app (or your favorite OTP authenticator app).
- Enter the OTP in the browser.
- Click Next.
- Enter a backup email address.
-
Click Next.
- Click Done.
How to set up a hardware security key (2FA)
- Click on the user icon in the top-right.
- Select Personal.
-
Select two-factor authentication.
- Select Hardware security key.
- Follow the on-screen wizard for configuring DDNS. (See Synology's help section for more details.)
- Verify your account password.
- Read through the information and click Next.
- Select the type of hardware key.
- Follow the on-screen instructions for enabling the device (this varies between hardware).
- Enter a name for your security hardware key.
- Select Done.
How to set up passwordless sign-in
- Click on the user icon in the top-right.
-
Select Personal.
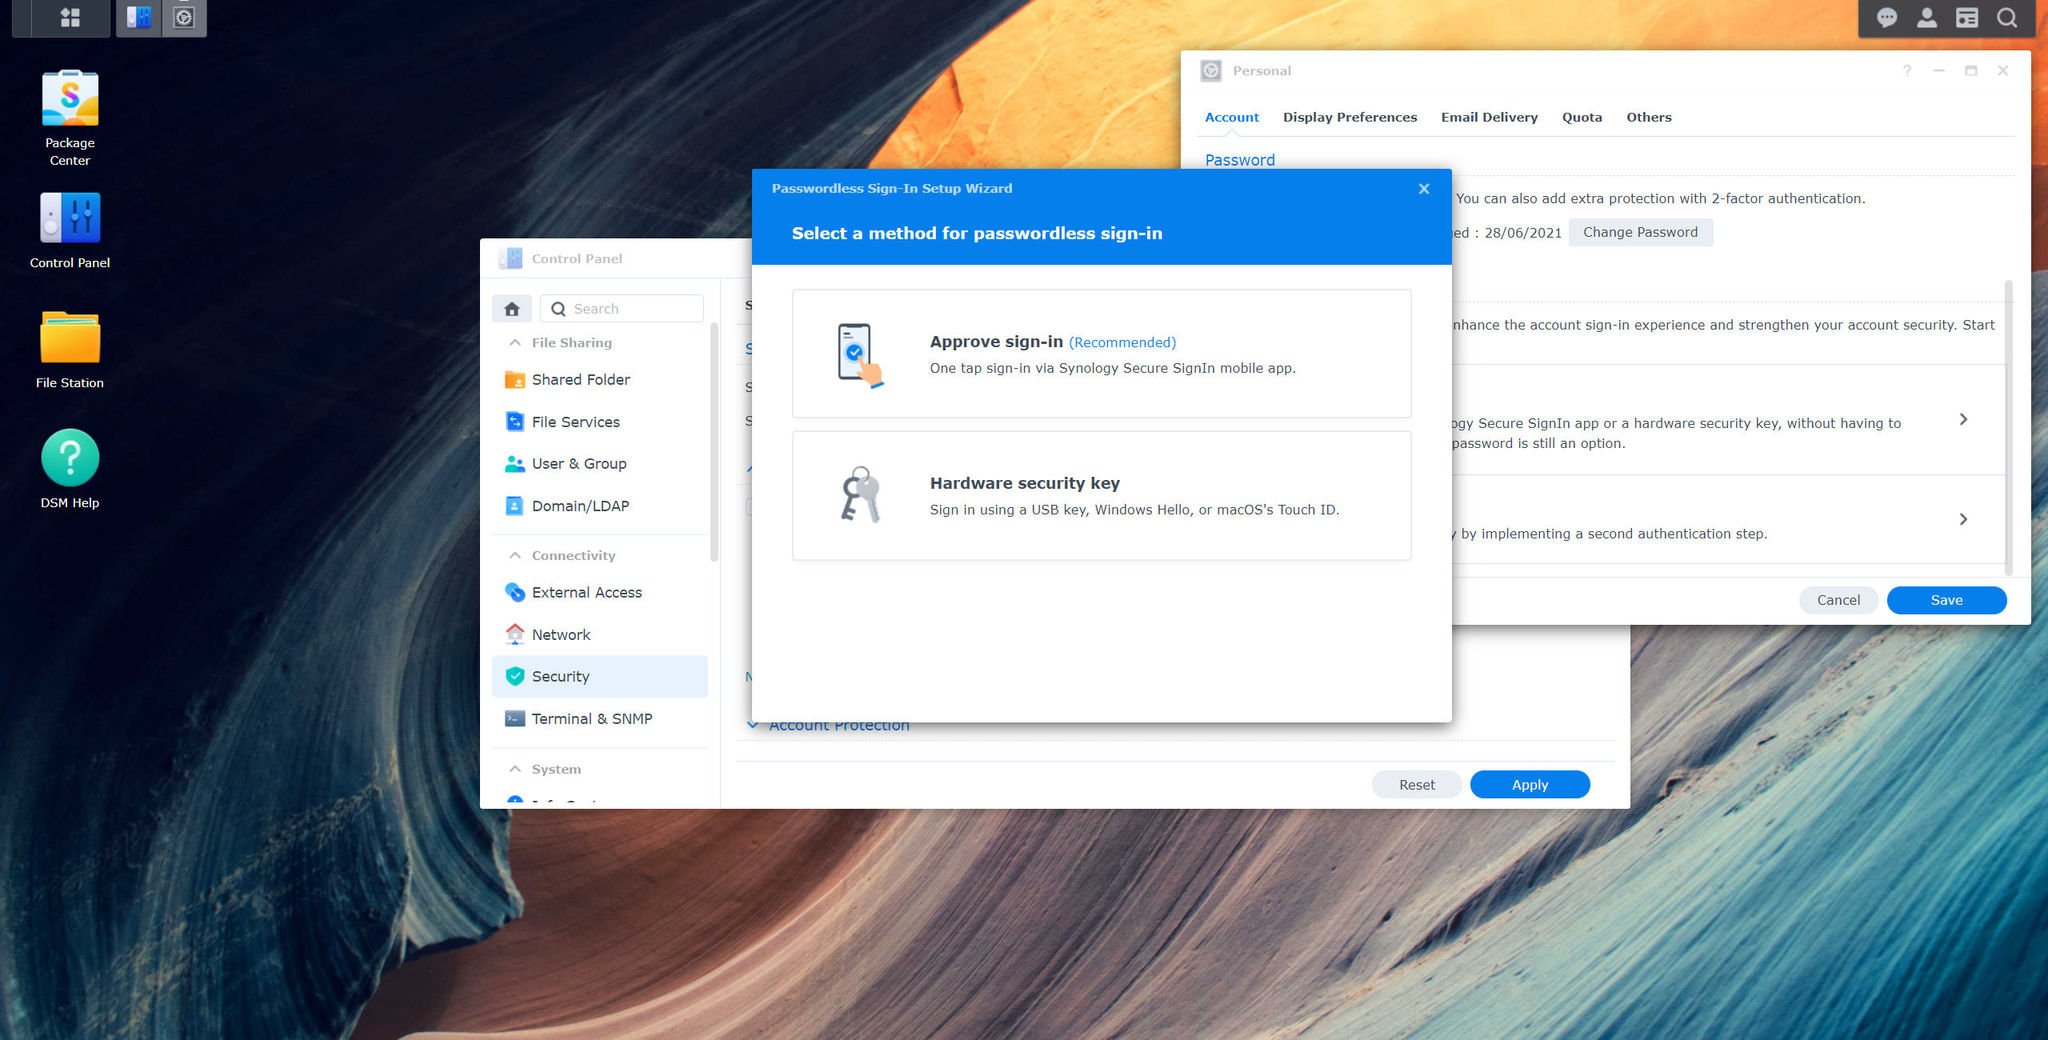
- Select Passwordless Sign-In.
- Select Approve sign-in.
- Verify your account password.
-
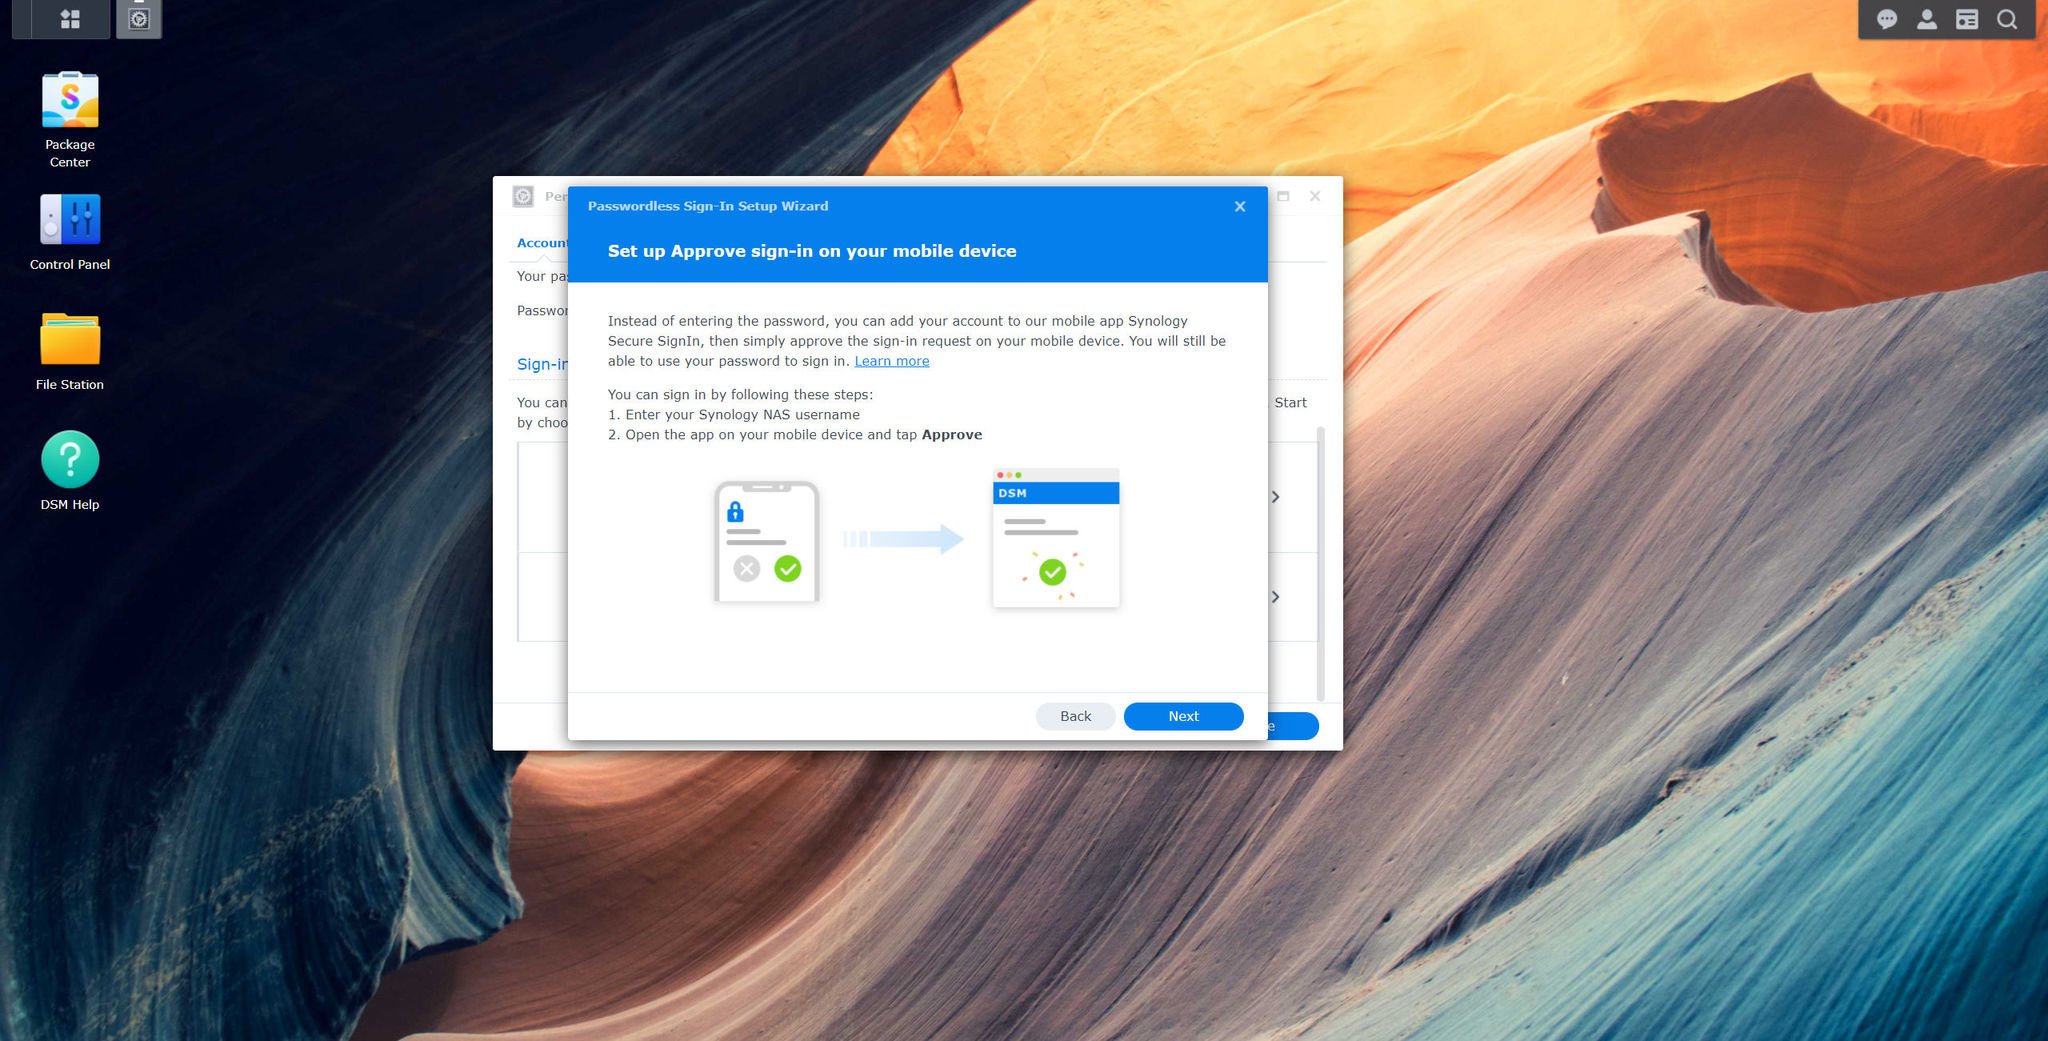
Read through the information and click Next.
- Download Synology SignIn app using the QR codes displayed, App Store, or Google Play.
- Click Next.
- Scan the QR code with the SignIn app.
-
Click Next.
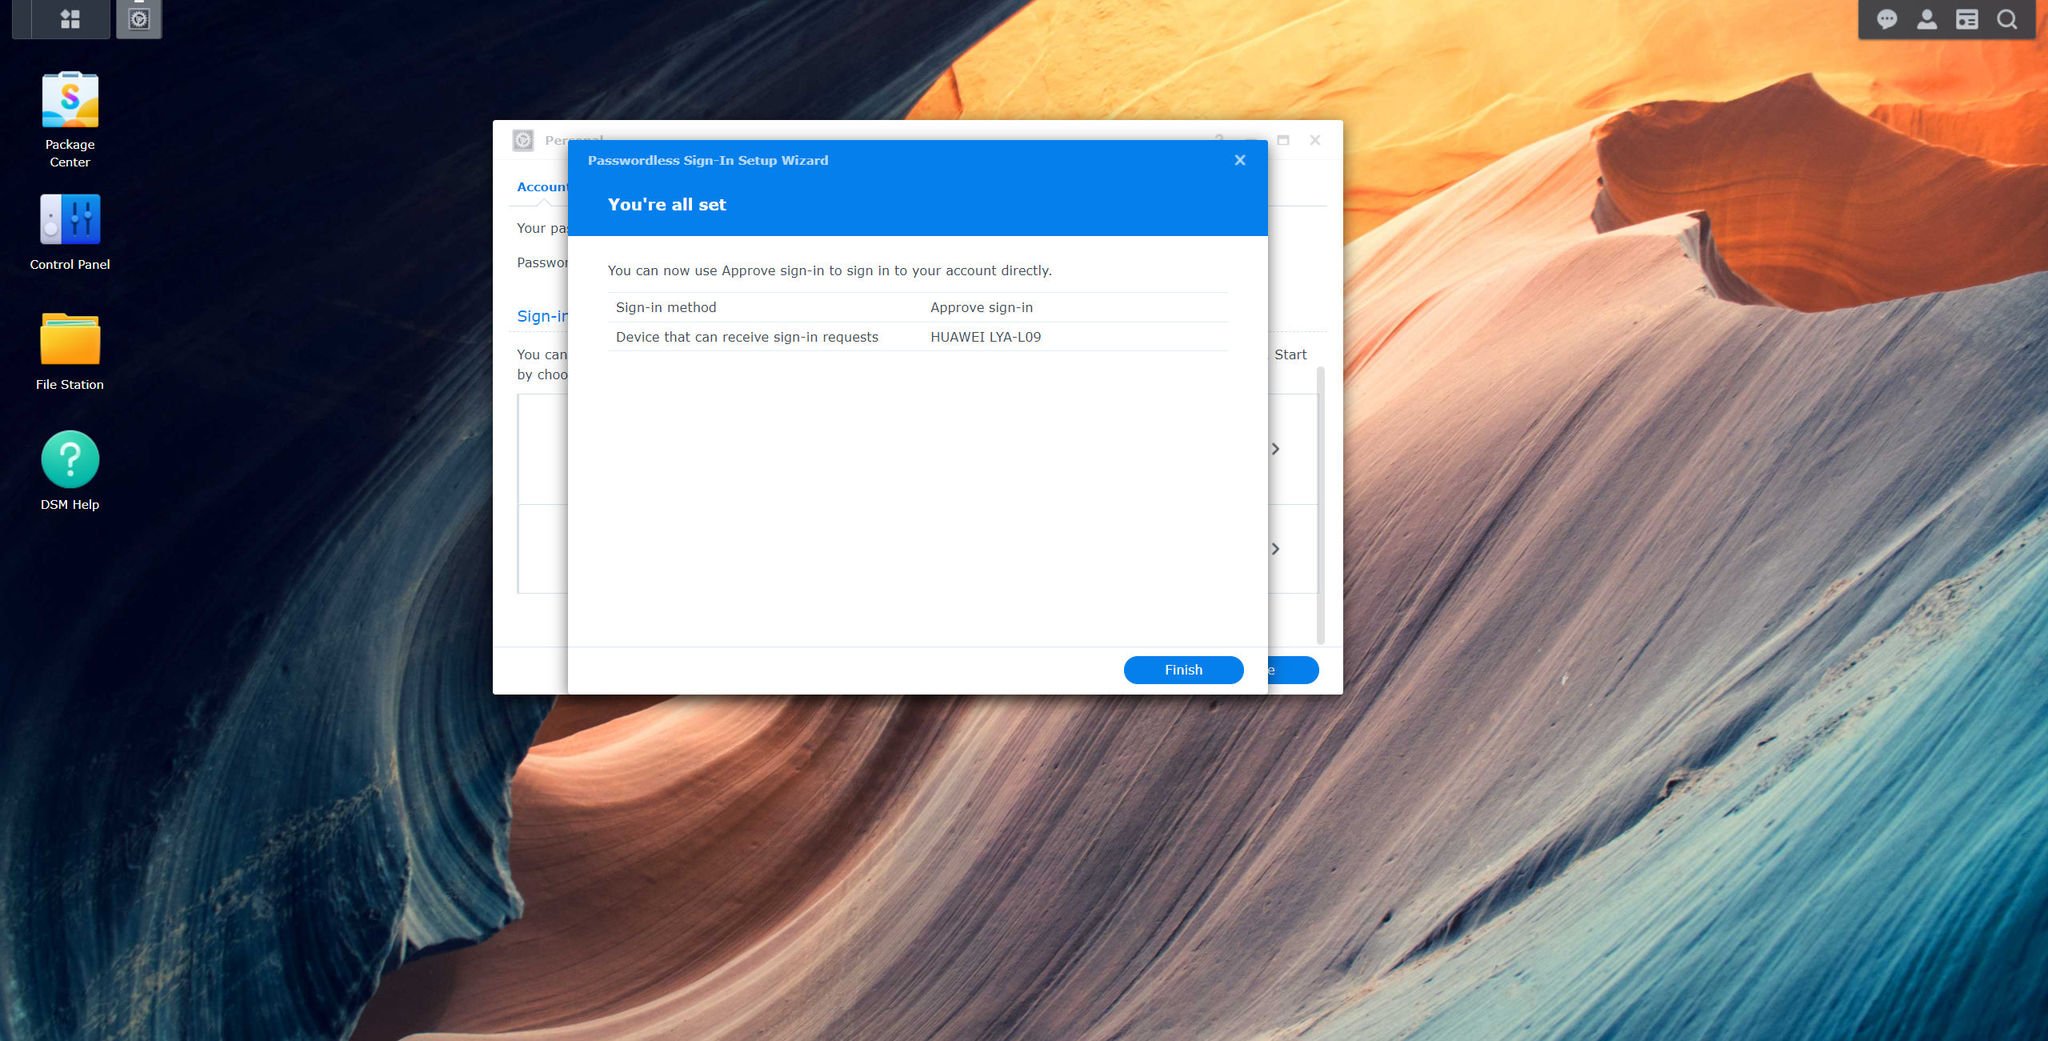
- Click Finish.
You will be required to use the configured authentication method when signing into your account on the NAS. To disable the authentication method, simply return to the settings pane and select it for deactivation.
Mouse Facial Recognition Camera
A fairly large webcam, but more importantly, it has 3D capabilities that make it fully compatible with Windows Hello.
Synology DS220+
Synology got mostly everything right with the DiskStation DS220+. It has a really good processor, upgraded DDR4 RAM, two drive bays, and dual 1Gb LAN ports, but it's just a shame about the lack of 2.5Gb LAN or M.2 slots.



No comments: