Do you want to know how your PC's storage performs? Here's how using the DiskSpd command-line tool for Windows 10.
In Windows 10, DiskSpd is an optional command-line tool that Microsoft has designed to test workload storage performance. Using this tool, you can quickly determine the performance of a drive to confirm if it's as fast as the manufacturer has advertised. Or you can compare the reads and writes of different hard drives to find out which is the fastest for specific workloads. For example, when you are building a server or workstation to host virtual machines, web hosting server, database, or you plan to run heavy input/output operations per second (IOPS) applications.
Whatever the reason might be, the DiskSpd includes many options that can help create a stress test to measure the maximum reads and writes performance a drive can handle, and the tool works on Windows 10 and Windows Server.
In this Windows 10 guide, we will walk you through the steps to get started benchmarking a hard drive performance with the DiskSpd command tool designed by Microsoft.
- How to install DiskSpd on Windows 10
- How to use DiskSpd on Windows 10
- How to review DiskSpd results on Windows 10
How to install DiskSpd on Windows 10
To install the DiskSpd command-line tool on Windows 10, use these steps:
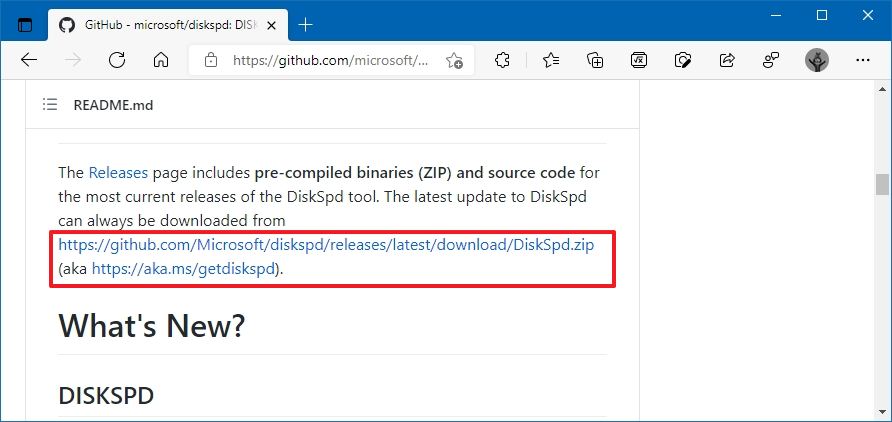
- Open DiskSpd GitHub download page.
-
Under the "Releases" section, click the DiskSpd.zip link.
- Save the file on the device.
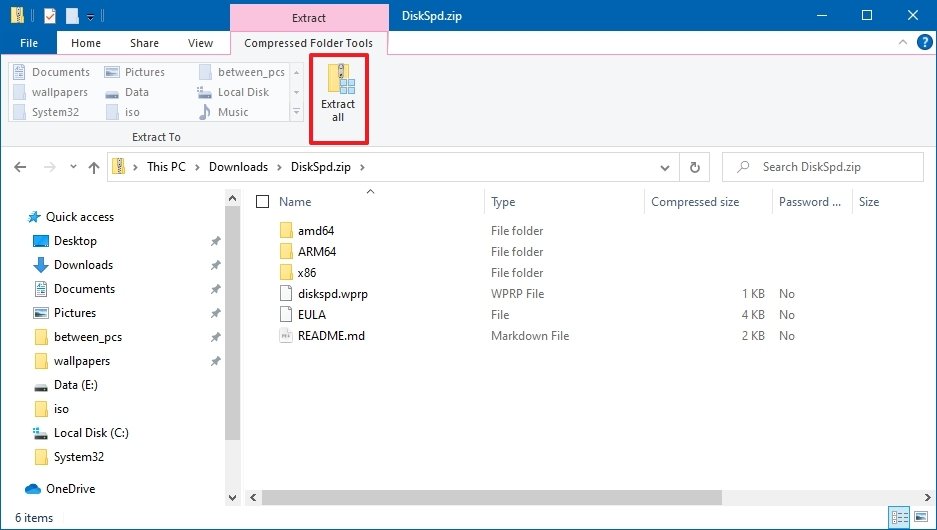
- Open the zip folder.
-
Click the Extract all option from the "Compressed Folder Tools" tab.
-
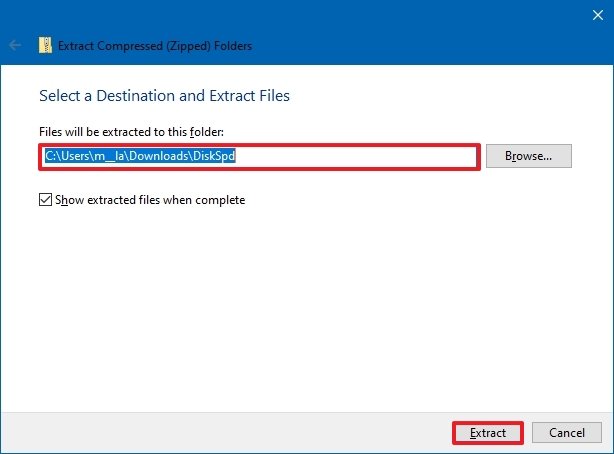
Confirm a path to extract the files.
- Check the Show extracted files when complete option.
- Click the Extract button.
Once you complete the steps, you can start using the tool from Command Prompt.
How to use DiskSpd on Windows 10
Before proceeding with the performance test, it's recommended to close all running applications and ensure that the storage health is in good condition.
To run the DiskSpd tool with Command Prompt on Windows 10, use these steps:
- Open Start.
- Search for Command Prompt, right-click the top result, and select the Run as administrator option.
-
Type the following command to navigate to the folder containing the DiskSpd tool and press Enter:
cd \PATH\TO\TOOLIn the command, make sure to specify the command to the destination of the DiskSpd.exe file.
For example, this command opens the tool location inside the "Downloads" folder:
cd C:\Users\username\Downloads\DiskSpd\amd64Quick note: You must use the version of the tool compatible with your installation. If you have a 64-bit version of Windows 10, you need to use the executable inside the "amd64" folder. Otherwise, if you are using the 32-bit version of the OS, then you should use the executable in the "x86" folder. If you do not know the system type of the device, you can check on Settings > System > About, under the "Device specifications" section.
-
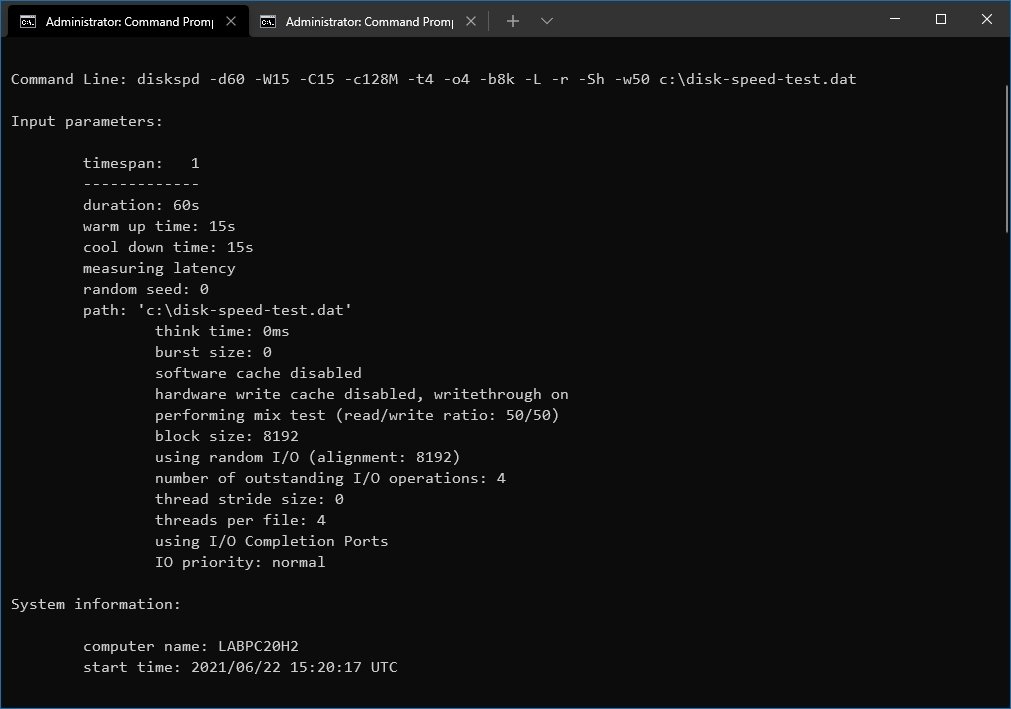
Type the following sample command to run the DiskSpd to test a read and write performance of a local hard drive on Windows 10 and press Enter:
diskspd -d60 -W15 -C15 -c128M -t4 -o4 -b8k -L -r -Sh -w50 c:\disk-speed-test.datQuick note: This tool is case-sensitive. As a result, you must type each parameter with the correct case for the command to run correctly. See the description below to understand the options we are using in the command. Also, in the command, do not forget to update the path and filename for the target data file as necessary.
-
(Optional) Type the following command to run the command and export the results to a text file, and press Enter:
diskspd -d60 -W15 -C15 -c128M -t4 -o4 -b8k -L -r -Sh -w50 c:\disk-speed-test.dat > c:\drive-test-results.txtQuick note: In the command, update the path and filename for the target data file and the file to store the benchmark results. Also, consider that when outputting the results to a text file, you won't see any results on the screen. Instead, the test results will be written to the text file.
-
(Optional) Type the following command to test sequential reads and press Enter:
diskspd -d60 -c128M -t4 -o4 -b8k -L -Sh -w0 -si c:\disk-speed-test.dat -
(Optional) Type the following command to test random reads and press Enter:
diskspd -d60 -c128M -t4 -o4 -b8k -L -Sh -w0 -r c:\disk-speed-test.dat -
(Optional) Type the following command to test sequential writes and press Enter:
diskspd -d60 -c128M -t4 -o4 -b8k -L -Sh -w100 -si c:\disk-speed-test.dat -
(Optional) Type the following command to test random writes and press Enter:
diskspd -d60 -c128M -t4 -o4 -b8k -L -Sh -w100 -r c:\disk-speed-test.dat
Once you complete the steps, the DiskSpd tool will test the hard drive performance based on the parameters you specified in the command.
Here's a breakdown of the options we used in the first command (see step No. 5):
- -d60 — Indicates how long the command will stress the hard drive in seconds.
- -W15 — Set the warm-up time before the test begins.
- -C15 — Set the cool-down time after the test.
- -c128M — Customize the size of the file to create for testing.
- -t4 — Indicates the number of threads to use. Usually, you can use one per available core in the processor.
- -o4 — Specifies the number of outstanding I/O requests per target per thread.
- -b8k — Defines the size of the block (default is 64K).
- -L — Measures latency statistics.
- -r — Produces random I/O. You can override this with the "-s" option.
- -Sh — Disables software and hardware write caching.
- -w50 — Specifies the percentage of write and read requests. Using 100 means that the command will write 100 percent of the time during the test. Using 0 means that the command will only perform 100 percent reads. For example, "-W50" will perform 50 percent writing and 50 percent reading. This is a balanced test, but you can change the number to adjust the test to fit your situation.
- c:\disk-speed-test.dat — This is the path to store the target file for the test.
We are focusing on showing some of the command examples to get you familiar with the tool. You can always use the diskspd /? command to review all the options available to build a custom command to test the storage based on your situation.
If you plan to use the DiskSpd tool, consider that these are artificial tests, which means that they will never match the real-world workloads. However, the tests will give you a good idea of what to expect. You only need to be aware of the options you choose to match your workload as closely as possible.
How to review DiskSpd results on Windows 10
The time of completion will depend on the parameters you configured in the command. As you execute the command, you won't see any information on the screen until the tool finishes the test.
Once the performance test is complete, the output will print on the screen. The first part includes a summary of the options you specified in the command, including the duration, warm-up and cool-down times, latency statistics, and other details.
Then there's the section that includes the results of the test, which is divided into multiple tables. In the first part of the result, you will find how long the command took to complete the test, the number of threats and processors. The that follows includes a summary of the average processor load during the test.
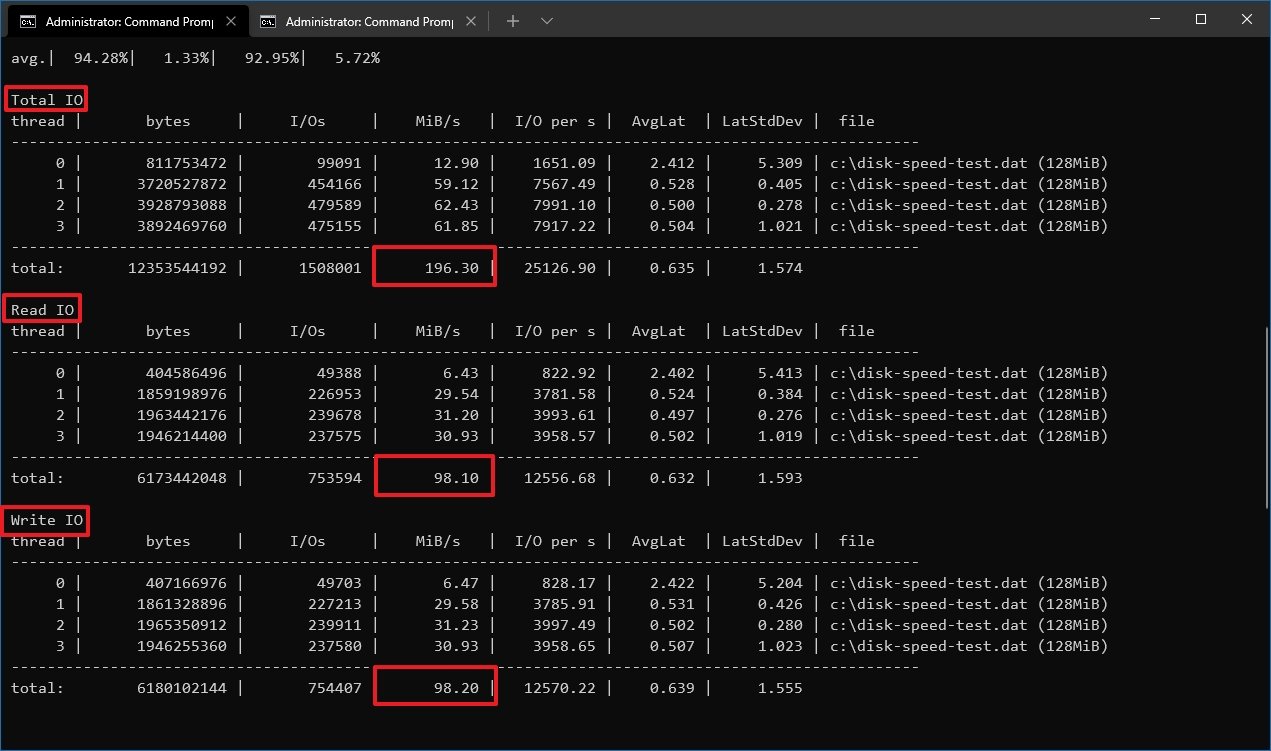
The "Total IO" table shows the reads and writes per thread. The information offers the average performance in mebibytes per second. Or the operations (reads and writes) that were executed in a given period (second), and the total input/output (IO) also in a given period. Usually, the information of importance would be the total result from the MiB/s, which tells you the average reads and writes in mebibytes per second.
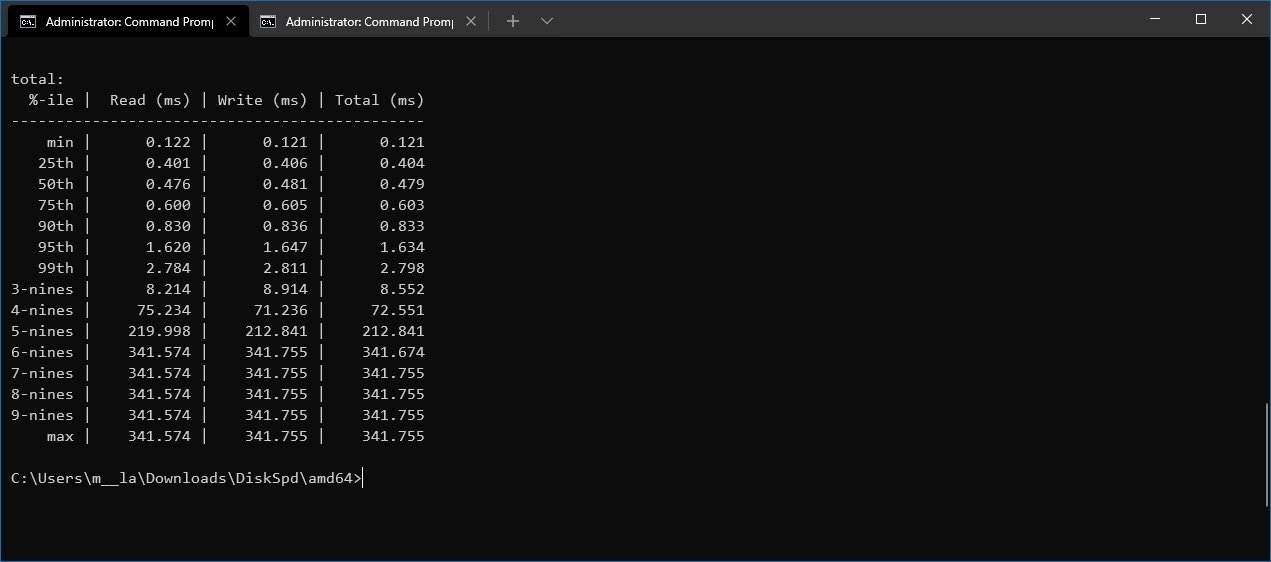
The "Read IO" table shows only the reads statistics per thread. The "Write IO" table shows only the writes statistics per thread. And the table at the bottom of the page includes information about the latency.
While these statistics can help understand how the drive performs, the information will make more sense if you already know what to expect. For example, knowing the reads and writes advertised by the manufacturer, you can determine whether the drive will live to the expectations. Or you can also rerun the DskSpd tool on different drives to determine which is the fastest.
More Windows 10 resources
For more helpful articles, coverage, and answers to common questions about Windows 10, visit the following resources:




No comments: